Make a Quilt Binding that Changes Colors with Your Quilt Design
After I sew the last stitch of a quilt top, I pull out my fabric and make the binding. There’s something about the momentum and excitement of finishing a quilt top that makes making the binding feel less like a chore.
Another practice of mine is to use scraps for the backing (#PartyInTheQuiltBack) and the binding, if possible. When I finished my sample quilt for my Assemblage Quilt pattern, I wanted to try two things:
To see if I could use the scraps left over from the quilt top to make the binding (Yay for buying less fabric and using scraps! 🎉)
To create a binding that extended the design of the quilt top
What You Need to Know Before You Make Your Quilt Binding
If you plan to match the color of your binding to your quilt top’s design, there’s one critical thing to do first:
NOTE: You’ll have to quilt your quilt top before you can make your binding.
As I mentioned, I tend to make my binding before I quilt my quilt top. Can’t do that here because, as we all know, your quilt top shrinks once it’s quilted. So, if you want your binding’s colors to match your quilt top, you’ll need to have accurate measurements. That means finish quilting your quilt and square it up before you take your measurements for your binding.
Below, I share how I went about using scraps from my Assemblage Quilt to make a color-blocked binding that matched my quilt top’s the design. While the example that follows was created with scraps from my Assemblage Quilt pattern, you can use this same process to create a binding that matches the patterns and colors found along the edge of any quilt top.

The Prep Work
Assess Your Needs
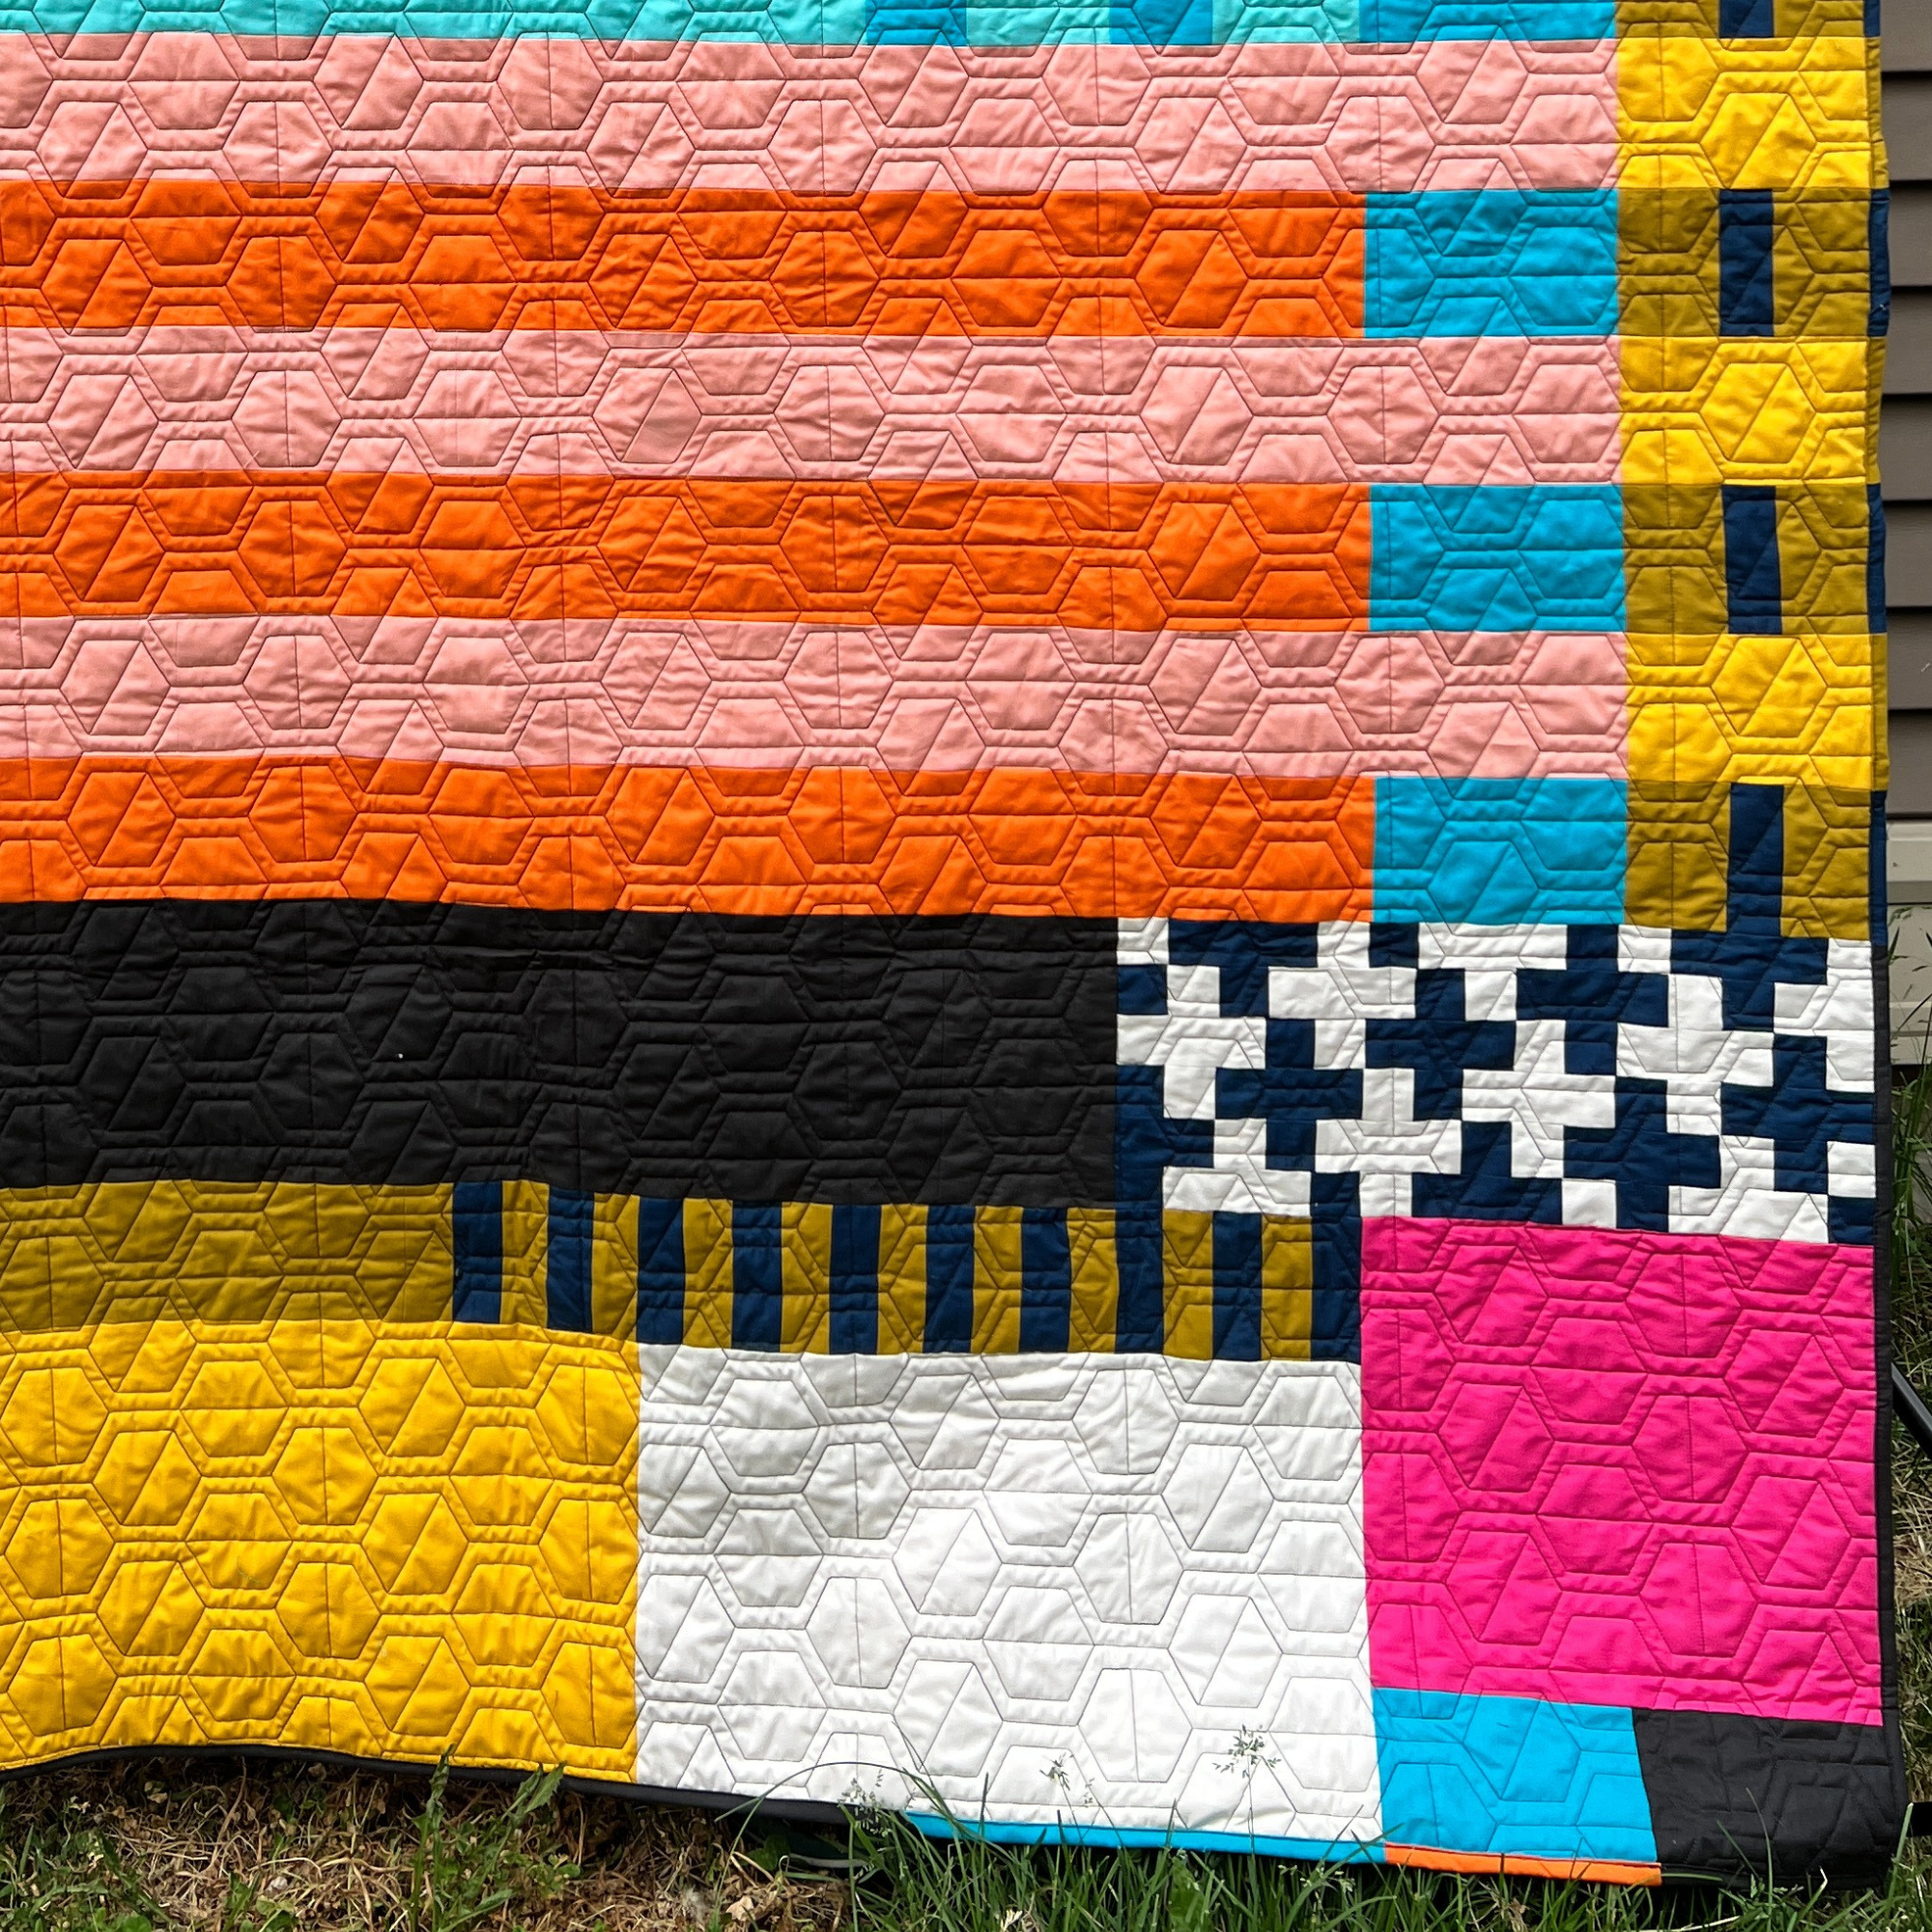
Take a look at the edge of your quilt top and where your fabrics change. What’s the smallest size piece along the edge of your quilt top? What’s the largest size piece? Are there any piece sizes that show up more than once? How wide is your top? How tall is your quilt?
In my example, for my Assemblage Quilt pattern, here’s what I discovered about my quilt top when I asked myself the questions above.
Smallest piece: approx. 3 ¾” long
Largest piece: approx. 43 ¾” long
Recurring piece sizes: 3 ¾”, 8”, 11 ¾”, 19”
Width: 62 ½”
Height: 82 ½”
Since my smallest piece size is 3 ¾” long, then I know I need scraps that are longer than 4” in length. I also know that I’ll need a variety of lengths of scraps to accommodate the different sizes. And, lastly, I know I’ll need more than 310 linear inches of binding (especially with all the seam allowance I’ll need because I’m sewing several small pieces together).
Gather Your Scraps
Since we want to use scraps (or you could do this with yardage or a mix of scraps and yardage), we first need to know what we have to work with. Gather your scraps.
In my case, I knew that I wanted pieces that were a minimum of 4” in length. So, if any of my scraps were shorter than that I threw them in the scrap bin for later.
Cut Your Scraps into Strips
Now that you have your fabric scraps, head to the cutting mat. Cut as many strips from your scrap pieces as you can get.
I prefer to cut my binding 2 ¼” wide. So, I cut as many 2 ¼” wide strips that measured at least 4” long from the scraps that remained from my Assemblage Quilt top.

Take an Inventory
Organize your strips into piles based on color, so you have a pile for each color of fabric. Now, take an inventory of the lengths you have in each color and the quantity. For instance, you may have managed to get (2) WOF strips and (3) 8 ¼” strips in one color. Write down what you have for each fabric.
My local quilt shop only sells yardage in ¼” yard increments, so I may have more scraps in some fabrics than you do after making your Assemblage Quilt. But, here’s what I managed to yield from cutting my Assemblage Quilt scraps into strips.
Fabric A:
(7) 19 ½”
(2) 17 ¾”
(1) 14 ½”
Fabric B: (1) 22 ½”
Fabric C:
(1) WOF
(1) 14 ½”
Fabric D:
(3) 10”
(2) WOF
Fabric E: (1) 24 ½”
Fabric F: (2) WOF
Fabric G:
(3) WOF
(1) 10 ½”
(1) 9”
Fabric H:
(2) 8”
(1) 32”
Fabric I: (1) 8 ¼”
Fabric J: (3) WOF

I ended up with more than 800 linear inches of strips, so I know I have more than enough to make it around my quilt despite the seam allowances and the corners.
Plan Your Quilt Binding Design
Now that you know what fabrics and lengths you have to work with, you can plot out where you want which fabrics to fall within your binding. Remember, we don’t want to sew anything just yet. We’ll need to take final measurements after the quilt has been quilted. Then, we’ll cut our binding pieces and sew them together in the order we desire.
It’s puzzle time! You’ll need an image of your quilt. You can use either a photo you’ve taken of your quilt top or use the image on your pattern. What we’ll do now is use that image to plan where we want which fabrics (based on what fabrics we have available).
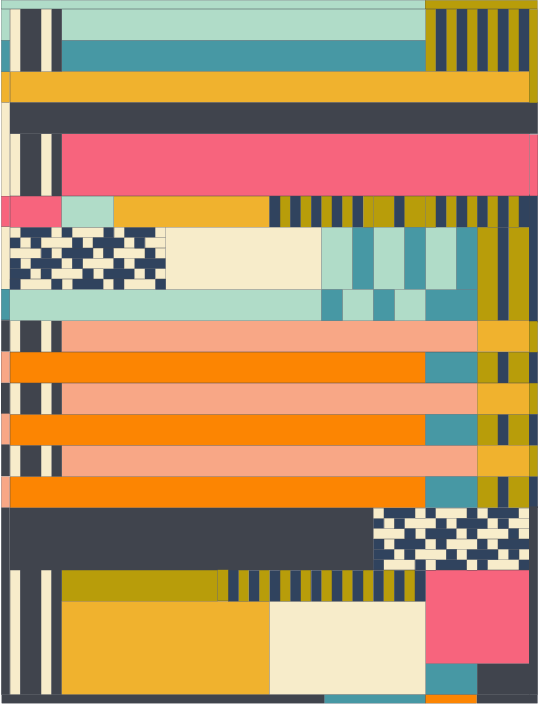
For my Assemblage Quilt binding, I wanted the binding to have the same collage look as the quilt design. I pulled out my pattern and drew on a mockup of the quilt to plot which fabrics I wanted where and where I would switch colors. I chose to match the fabric along the quilts edge in some places and to contrast the fabric in others.
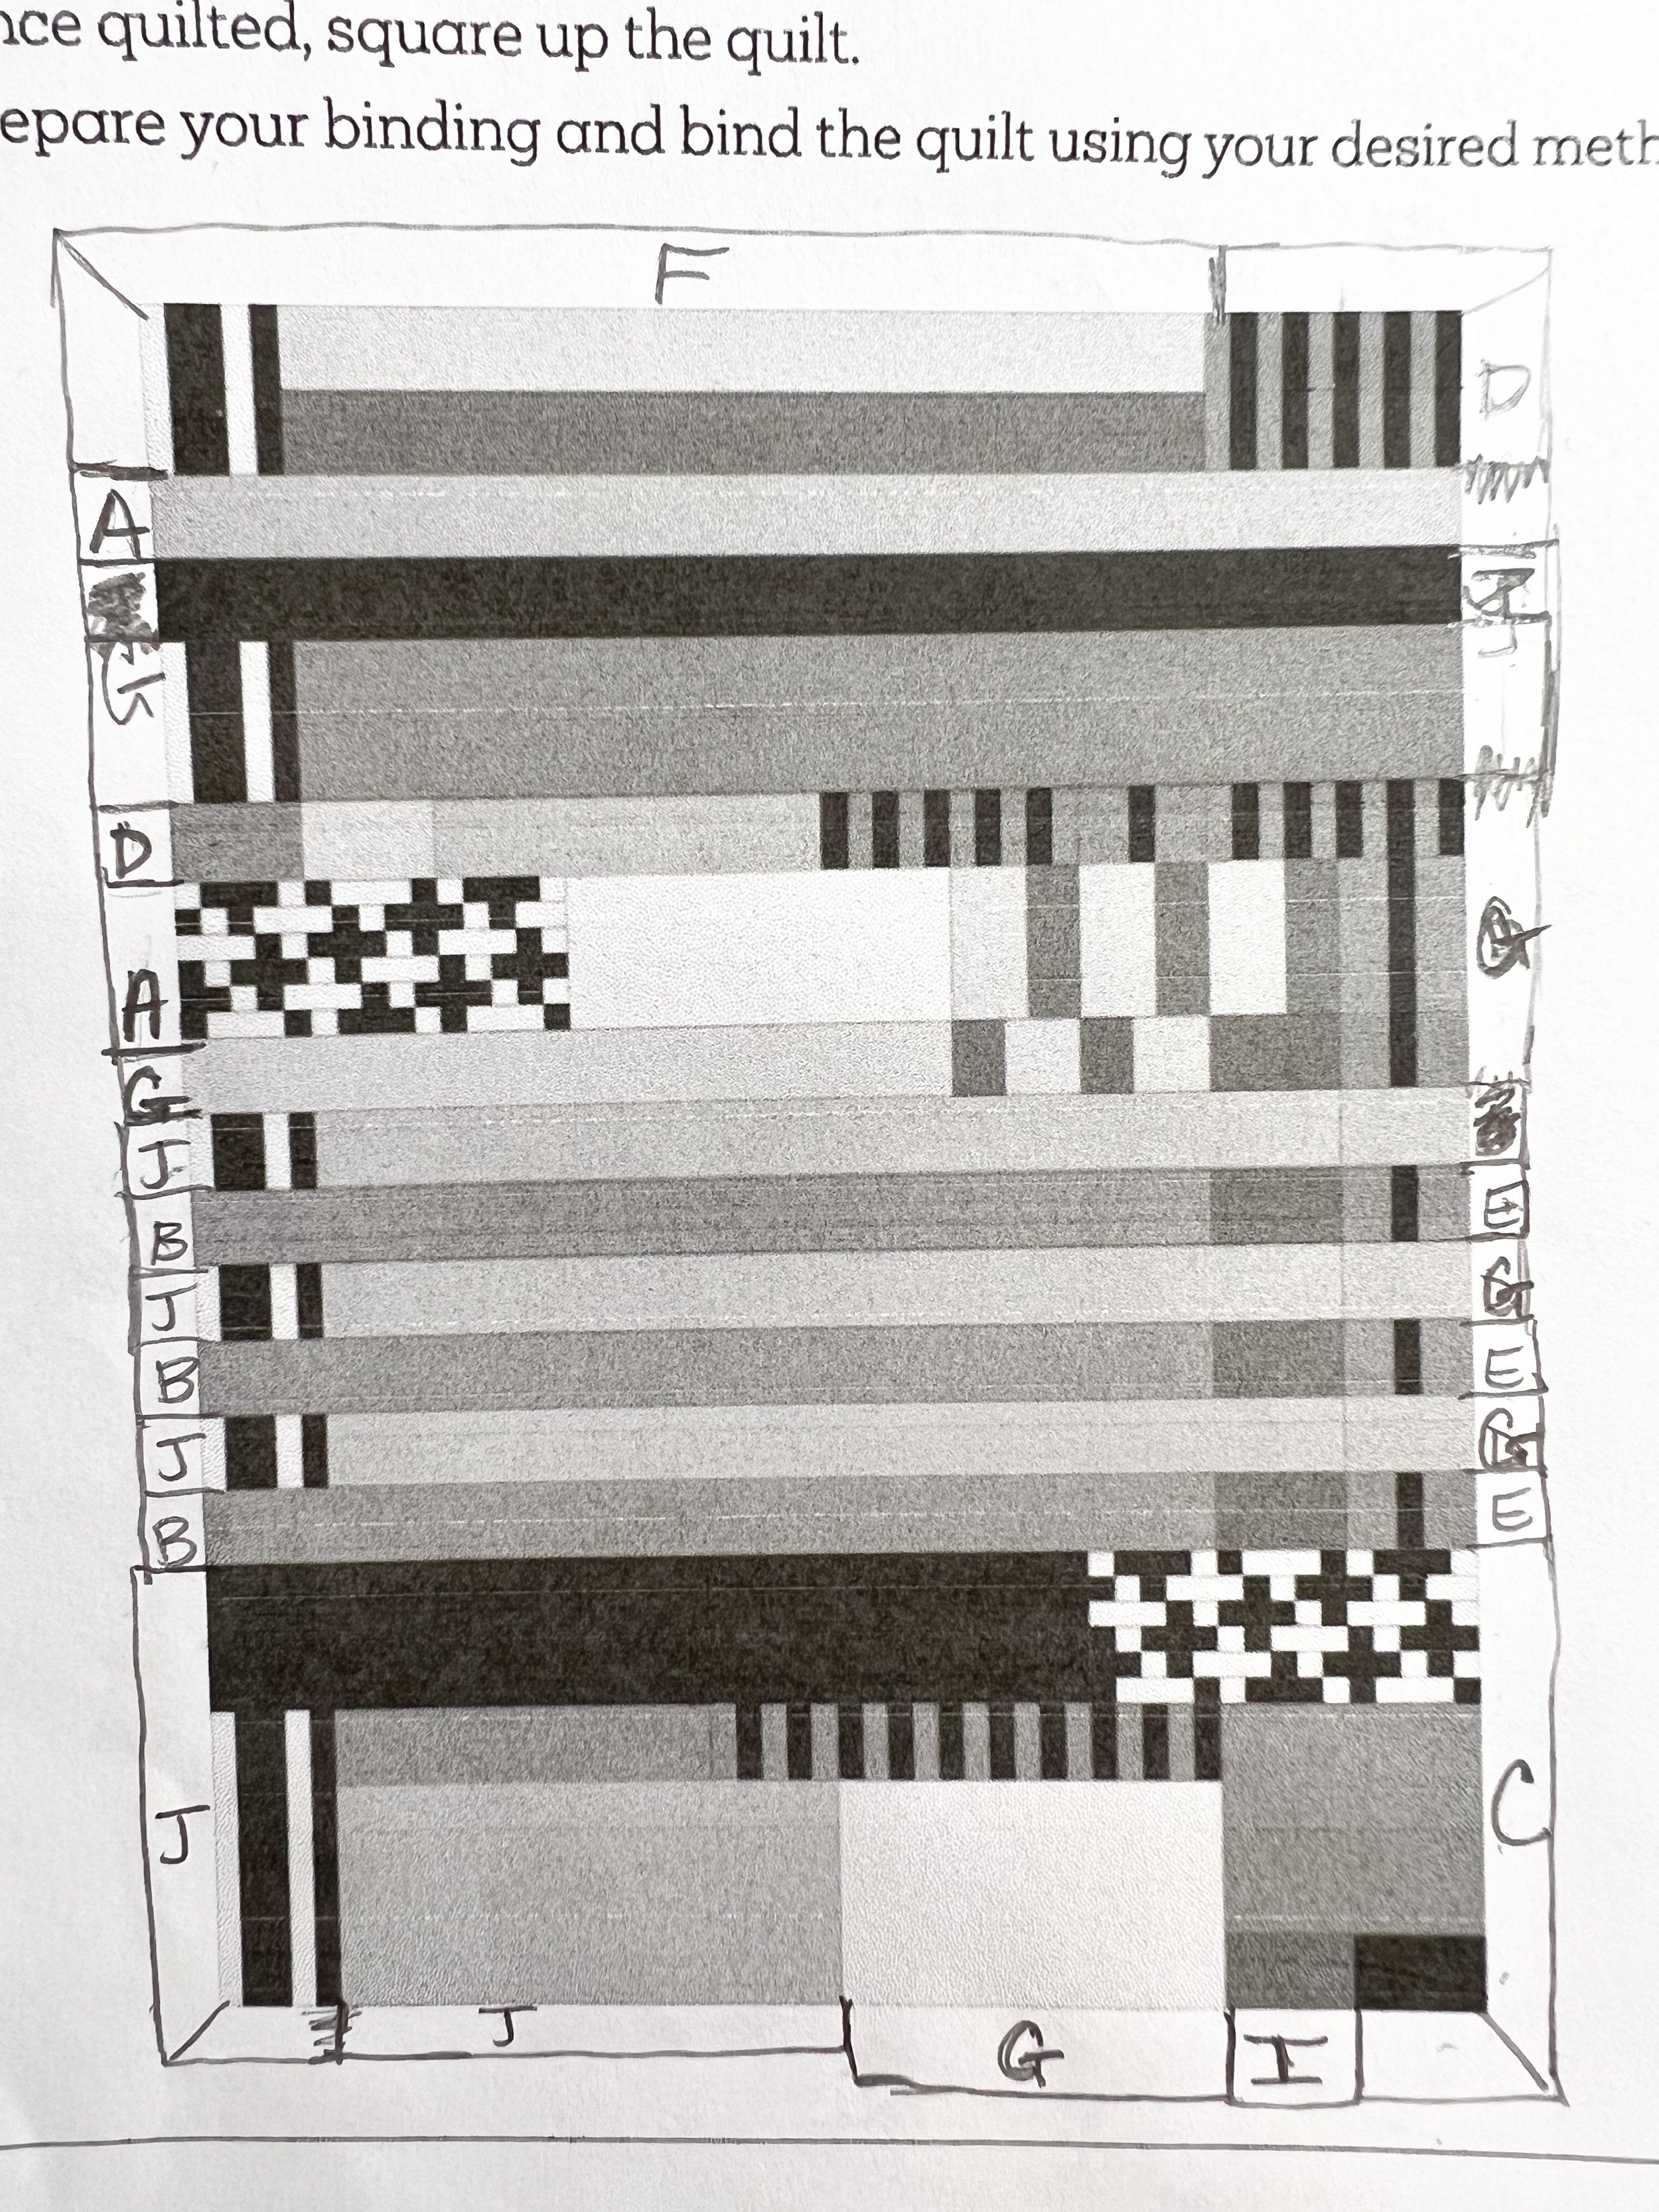
Now that I have my plan, I have to wait to get my quilt back from the longarmer. Then, I’ll take my measurements, cut my pieces and begin sewing my binding strip.
Create Your Binding
With your quilt quilted, you’re ready to create your binding. Matching the seams on your binding to your quilt top means that we need precise measurements for each piece and that we’ll sew the binding pieces together using a straight seam instead of a mitered (or diagonal) seam.
You’ll create two sections of binding instead of one long strip like normal. Then, you’ll attached your two sections of binding to your quilt top and join the binding in two places instead of just one (as usual).
1. Take Measurements of Your Quilted Top
Following the plan you made for your color-blocked binding, measure each length needed for each fabric, then add a ½” to account for the seam allowance on both ends.
Work along the parameter of your quilt top until you’ve collected a measurement for every piece–adding in your seam allowance, extra length at the corners and extra length on the ends (as explained below).
Here are the finished measures of my quilt top. I added a ½” to each of these measurements to account for the seam allowance. I added 2 ½” to the corners . Finally, I added extra fabric to the ends to make joining the two sections easier.
| Left section | Right section | ||
|---|---|---|---|
a. Add Extra at the Corners
I know I’ll need extra fabric at the corners, and I don’t want seams in my corner. To avoid seams at the corner, make sure to have the same fabric along both edges of each corner.
At the corners add the width of your binding in inches to the linear measurement. For instance, my binding is 2 ¼”, so I’ll add 2 ¼” to the linear measurement to get the amount I’ll need to make my mitered corner.
b. Add Extra Where You’ll Join Your Two Sections of Binding
It’s easiest to hide your joins if you’re connecting two pieces of the same fabric. Select two large sections on either side (or the top and bottom) of your quilt top where you plan to join the two sections of binding.
Each binding section will begin with the same fabric and end with the same fabric. Add and extra 6” of fabric to the end of section.

2. Cut and Sew Your Binding
Cut your pieces and keep them in the order as you cut. Sew your binding pieces together in two sections. Press your seams open to reduce bulk.
3. Press Your Binding
Press you two sections in half with wrong sides together.
Attach Your Binding to Your Quilt Top
With your quilt top squared up and your binding made, you’re ready to attach you binding.
1. Attached Your Binding to Your Quilt Top
Align your binding to your quilt top according to your plan. Place a pin at each point you want to match. Leaving a 10” strip of binding loose at each end, sew your binding to your quilt.
2. Join Your Two Binding Sections
To join the ends of yoru two binding sections, first you’ll need to trim any excess binding. Lay your two binding strips flat along the edge of your quilt. The two strips should overlap by an amount equal to the width of your binding strip. In my case, this is 2 ¼”. Trim your strips.
Tip: You don’t need a ruler for this part. Trim a just a small big off the end of one of your stipes, open it up and use it as a reference for your binding width measurement.
Place your two strips right sides together at a 90° angle (forming an “L”). Place a pin at a 45° angle and test to see if your binding will lay as expected after sewn (no one wants a twisted binding!).
Sew your strips together on a 45° angle (just like an HST). Before your trim your seam allowance, be sure your binding will fold and lay flat and is the correct length. Once you’re confident, trim you seam allowance to ¼” and finger press the seam open. Sew the binding to the top. Repeat these steps for the other join.

3. Wrap Your Binding Around the Edge & Sew
Wrap your binding around the edge, paying special attention to your corners. Sew. Celebrate!
The Possibilities Are Endless
The binding is more than just a utilitarian finish to your quilt. It deserves a little consideration. Do you want the binding to frame your quilt? Do you want the binding to blend in or stand out? With my Assemblage Quilt, I wanted the binding to be part of the design. Creating this color-blocked binding didn’t take any additional time to construct. It just took a little planning (and I got to use scraps!).
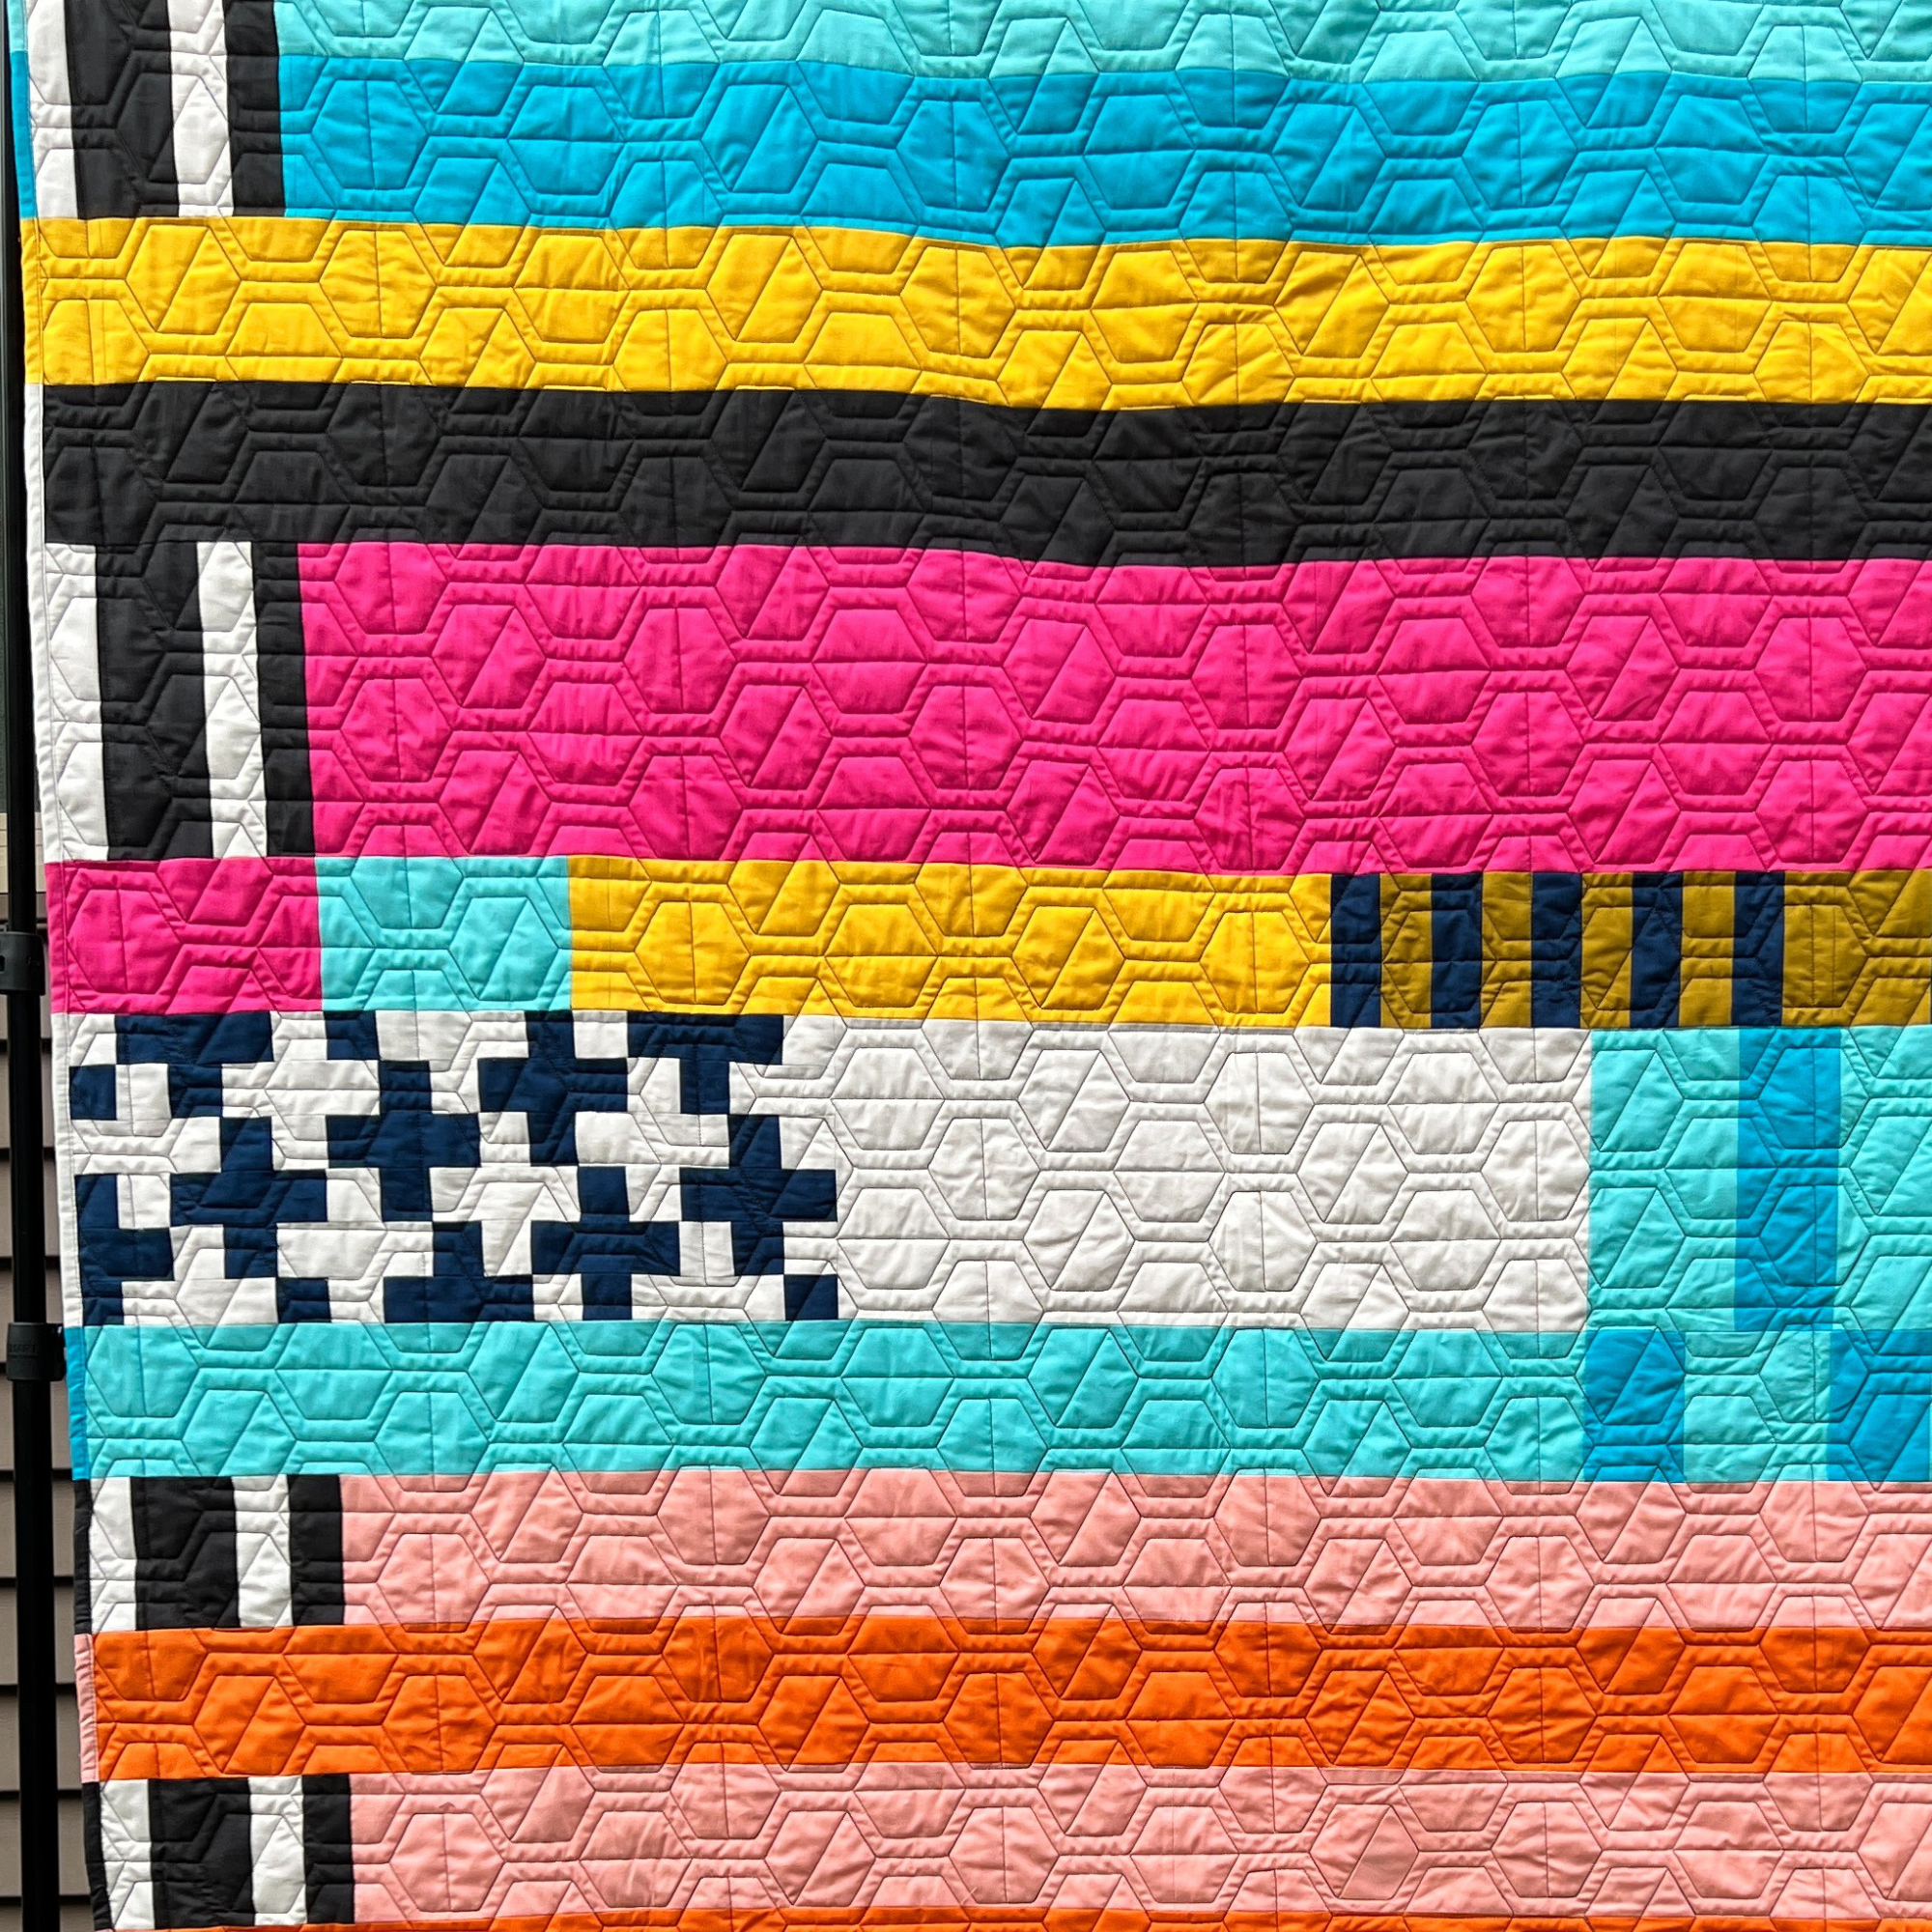
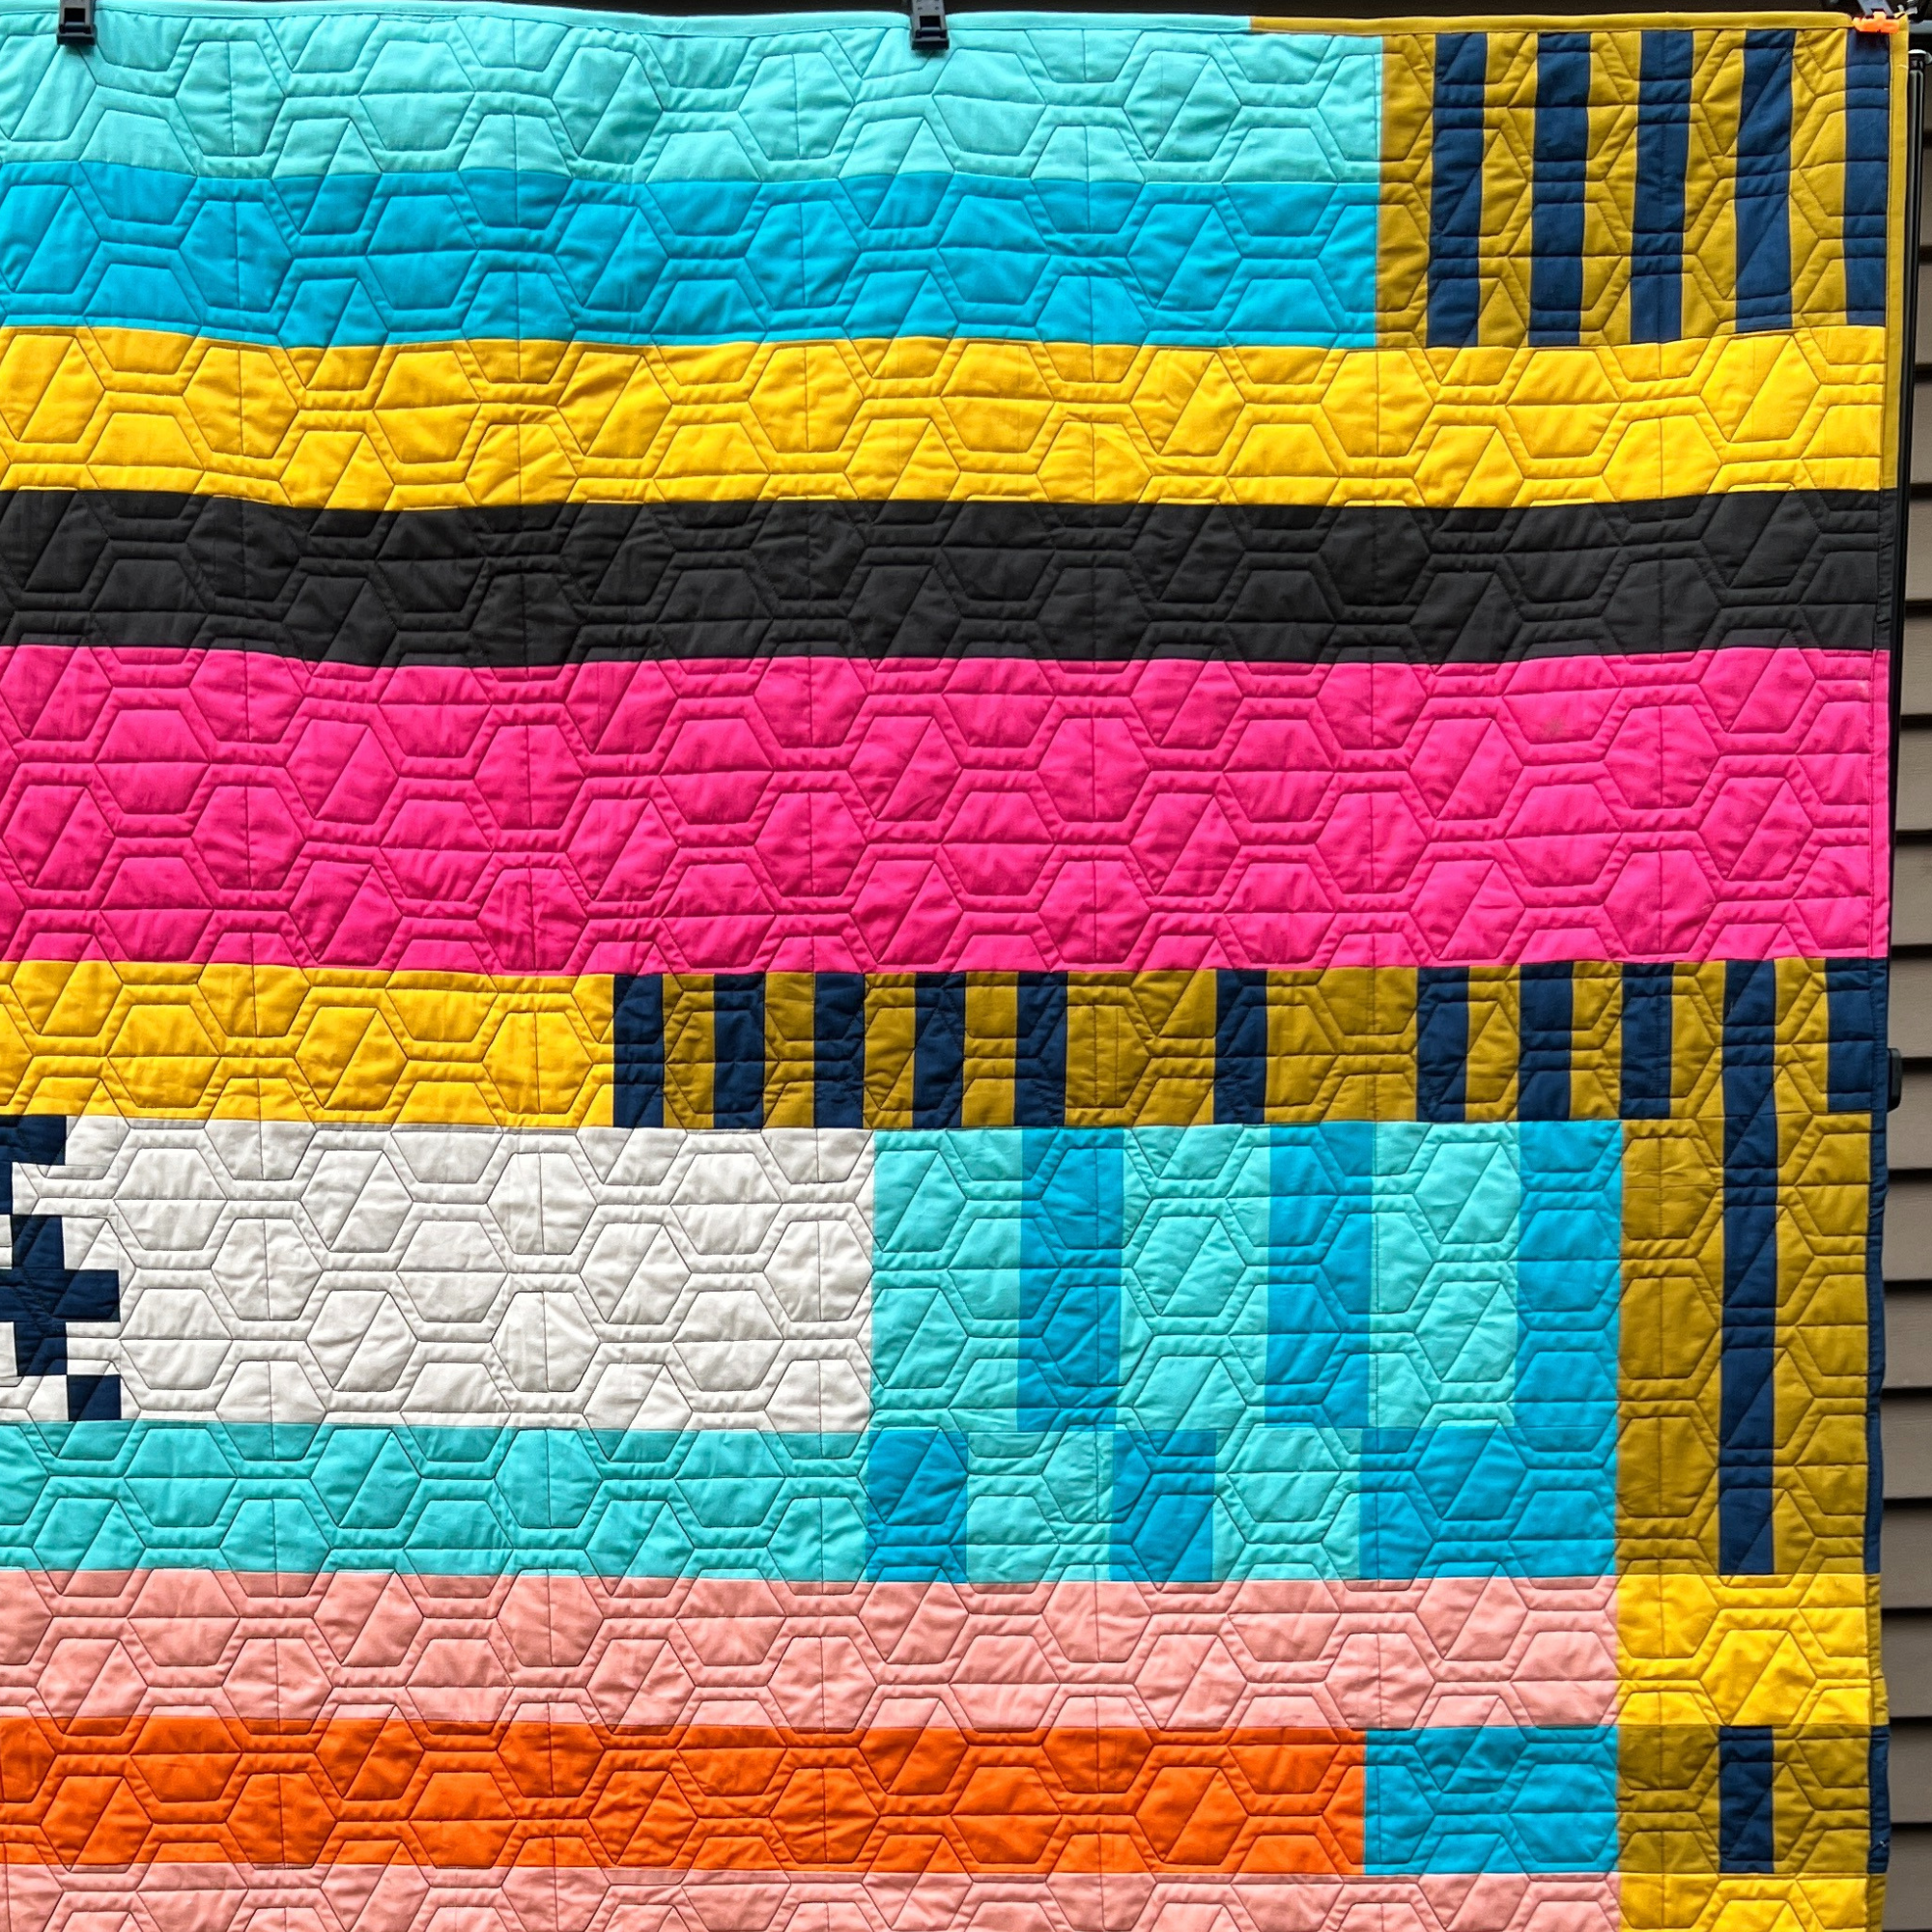
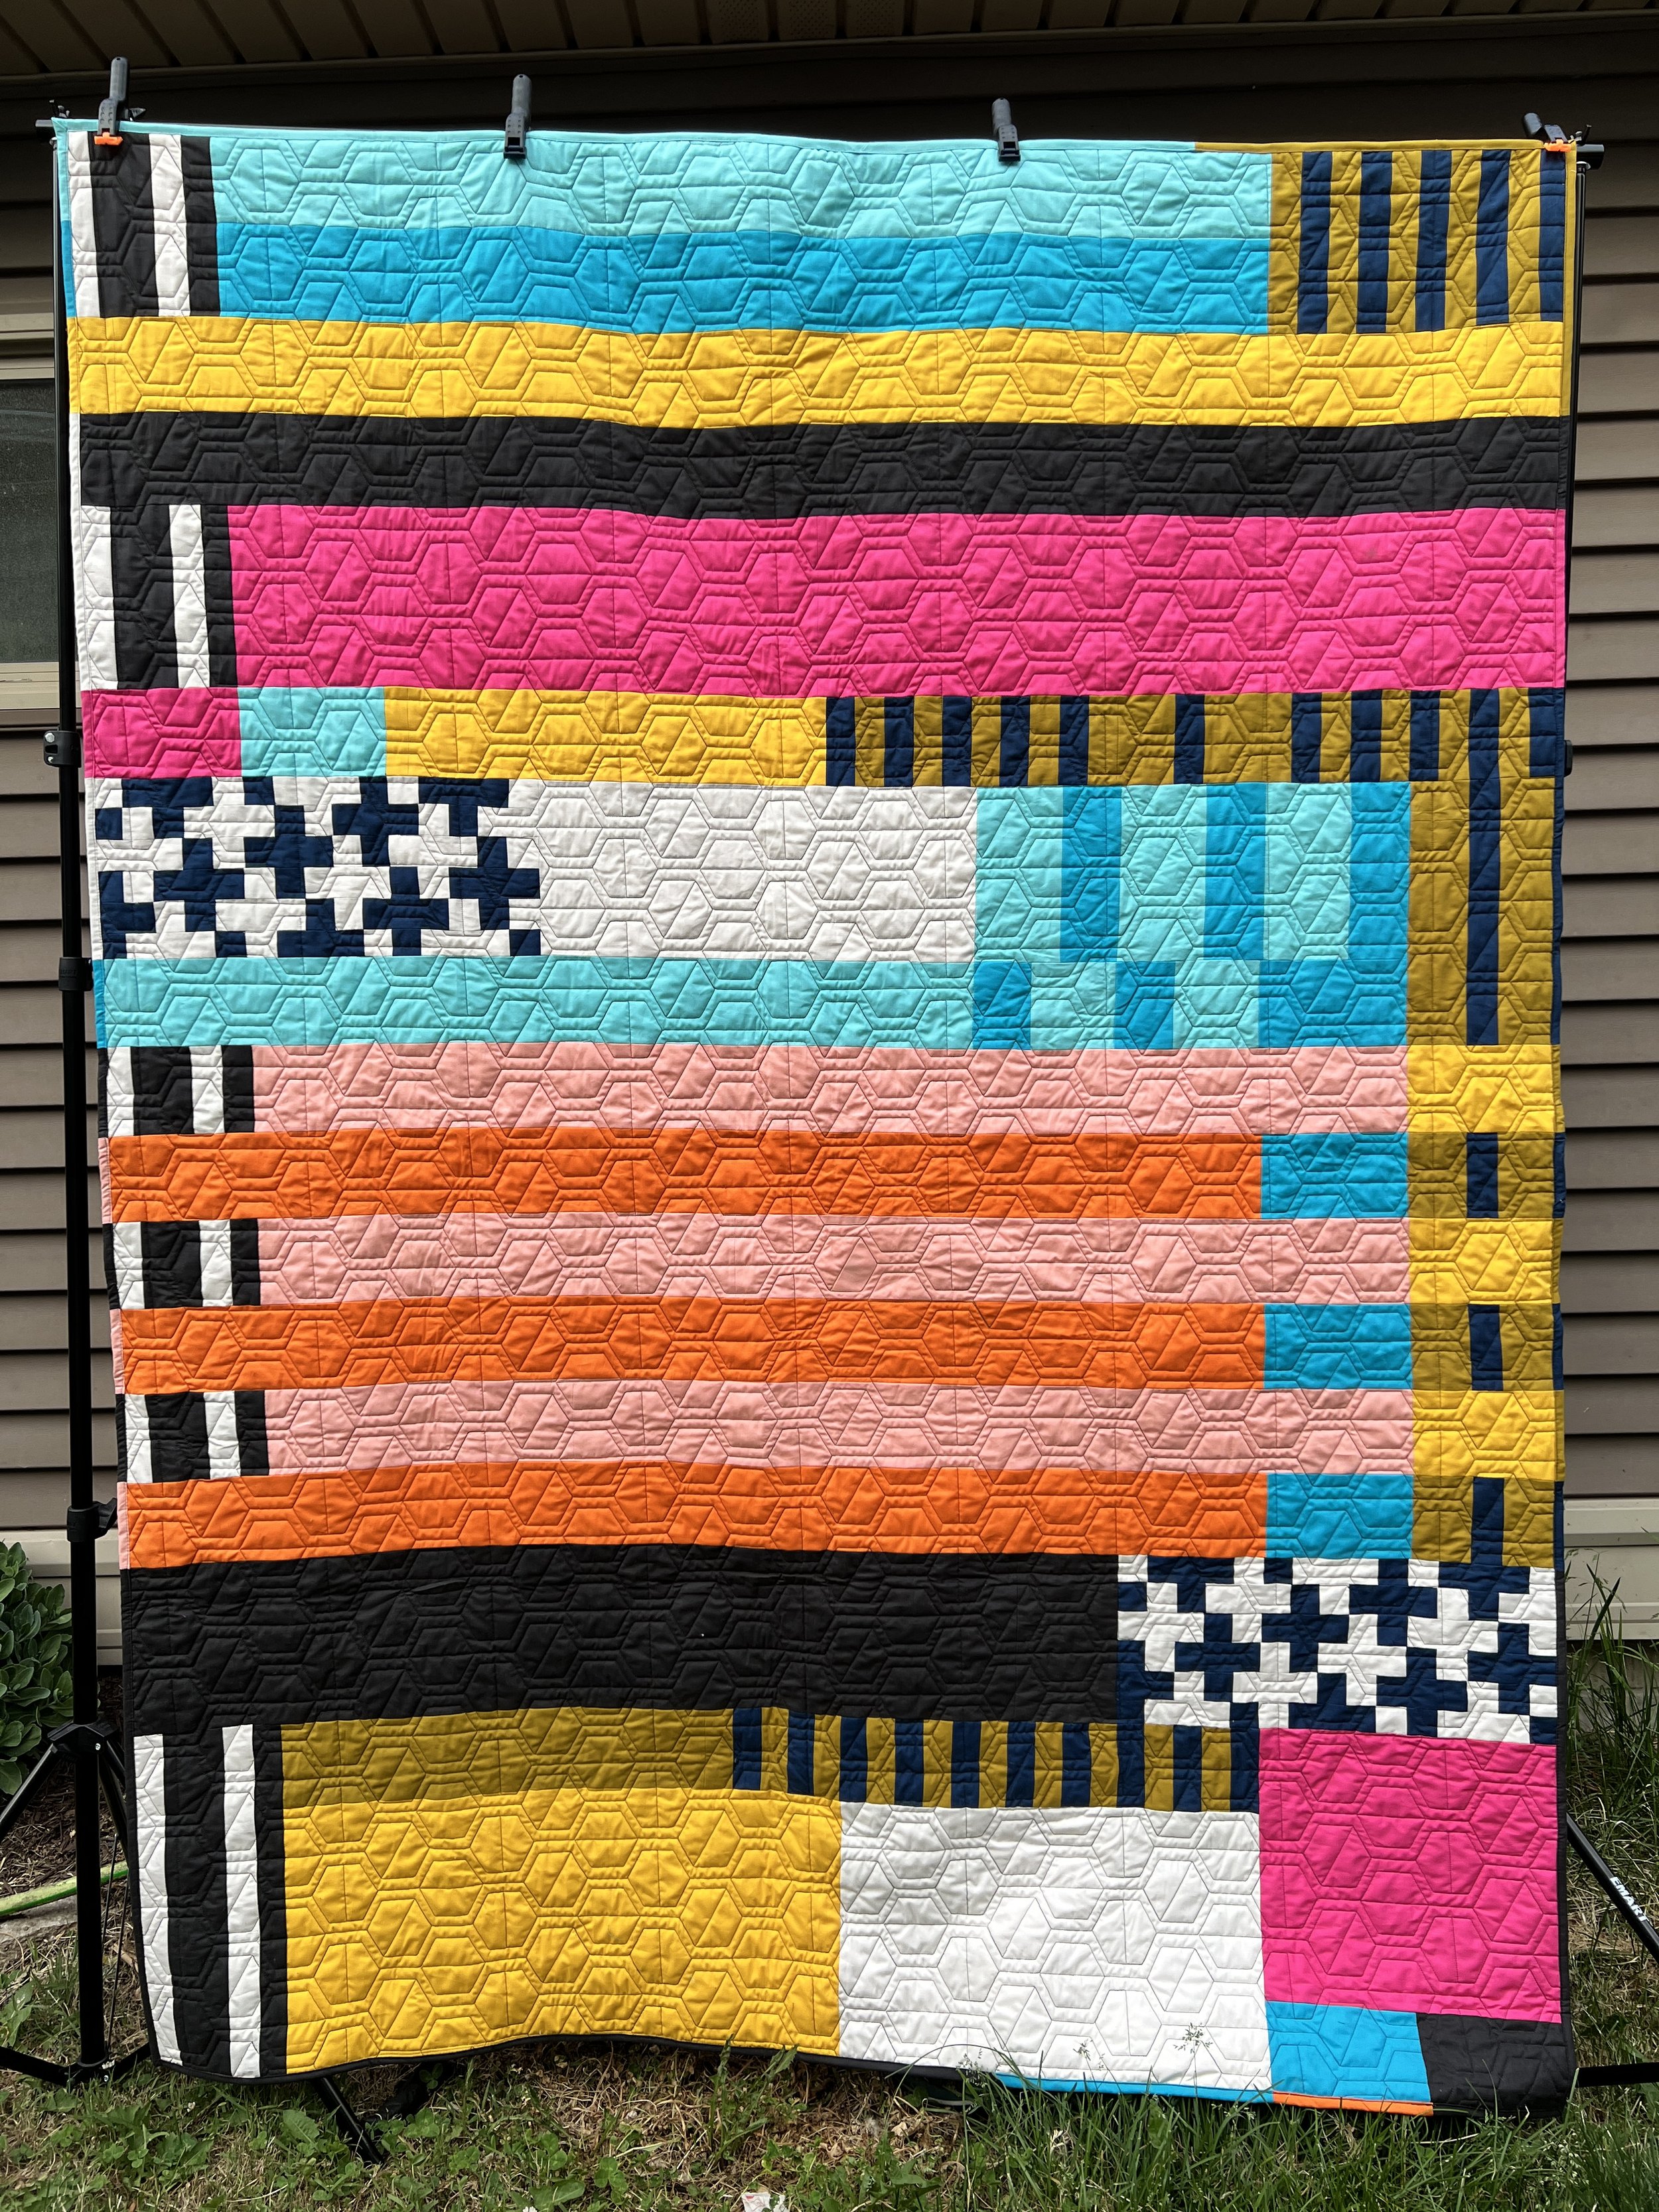
About the Assemblage Quilt
My Assemblage sample quilt was made using Painter’s Palette Solids from Paintbrush Studios with a 108” wide back from Ruby Star Society. Haley Fetter of Mistletoe Quilting Co. added edge-to-edge quilting using one of her original pantos.