FROM INSPIRATION TO QUILT DESIGN
At the beginning of the year, I set a goal for myself to make time to just play with fabric. I made a list of prompts and set reminders on my phone. My plan was simple—just make time, just play with no goal in mind other than to play with fabric and enjoy sewing.
In January, my plan was to play with circles. So, I did just that. (You can see photos of this play session in a previous post.)
Then this happened.
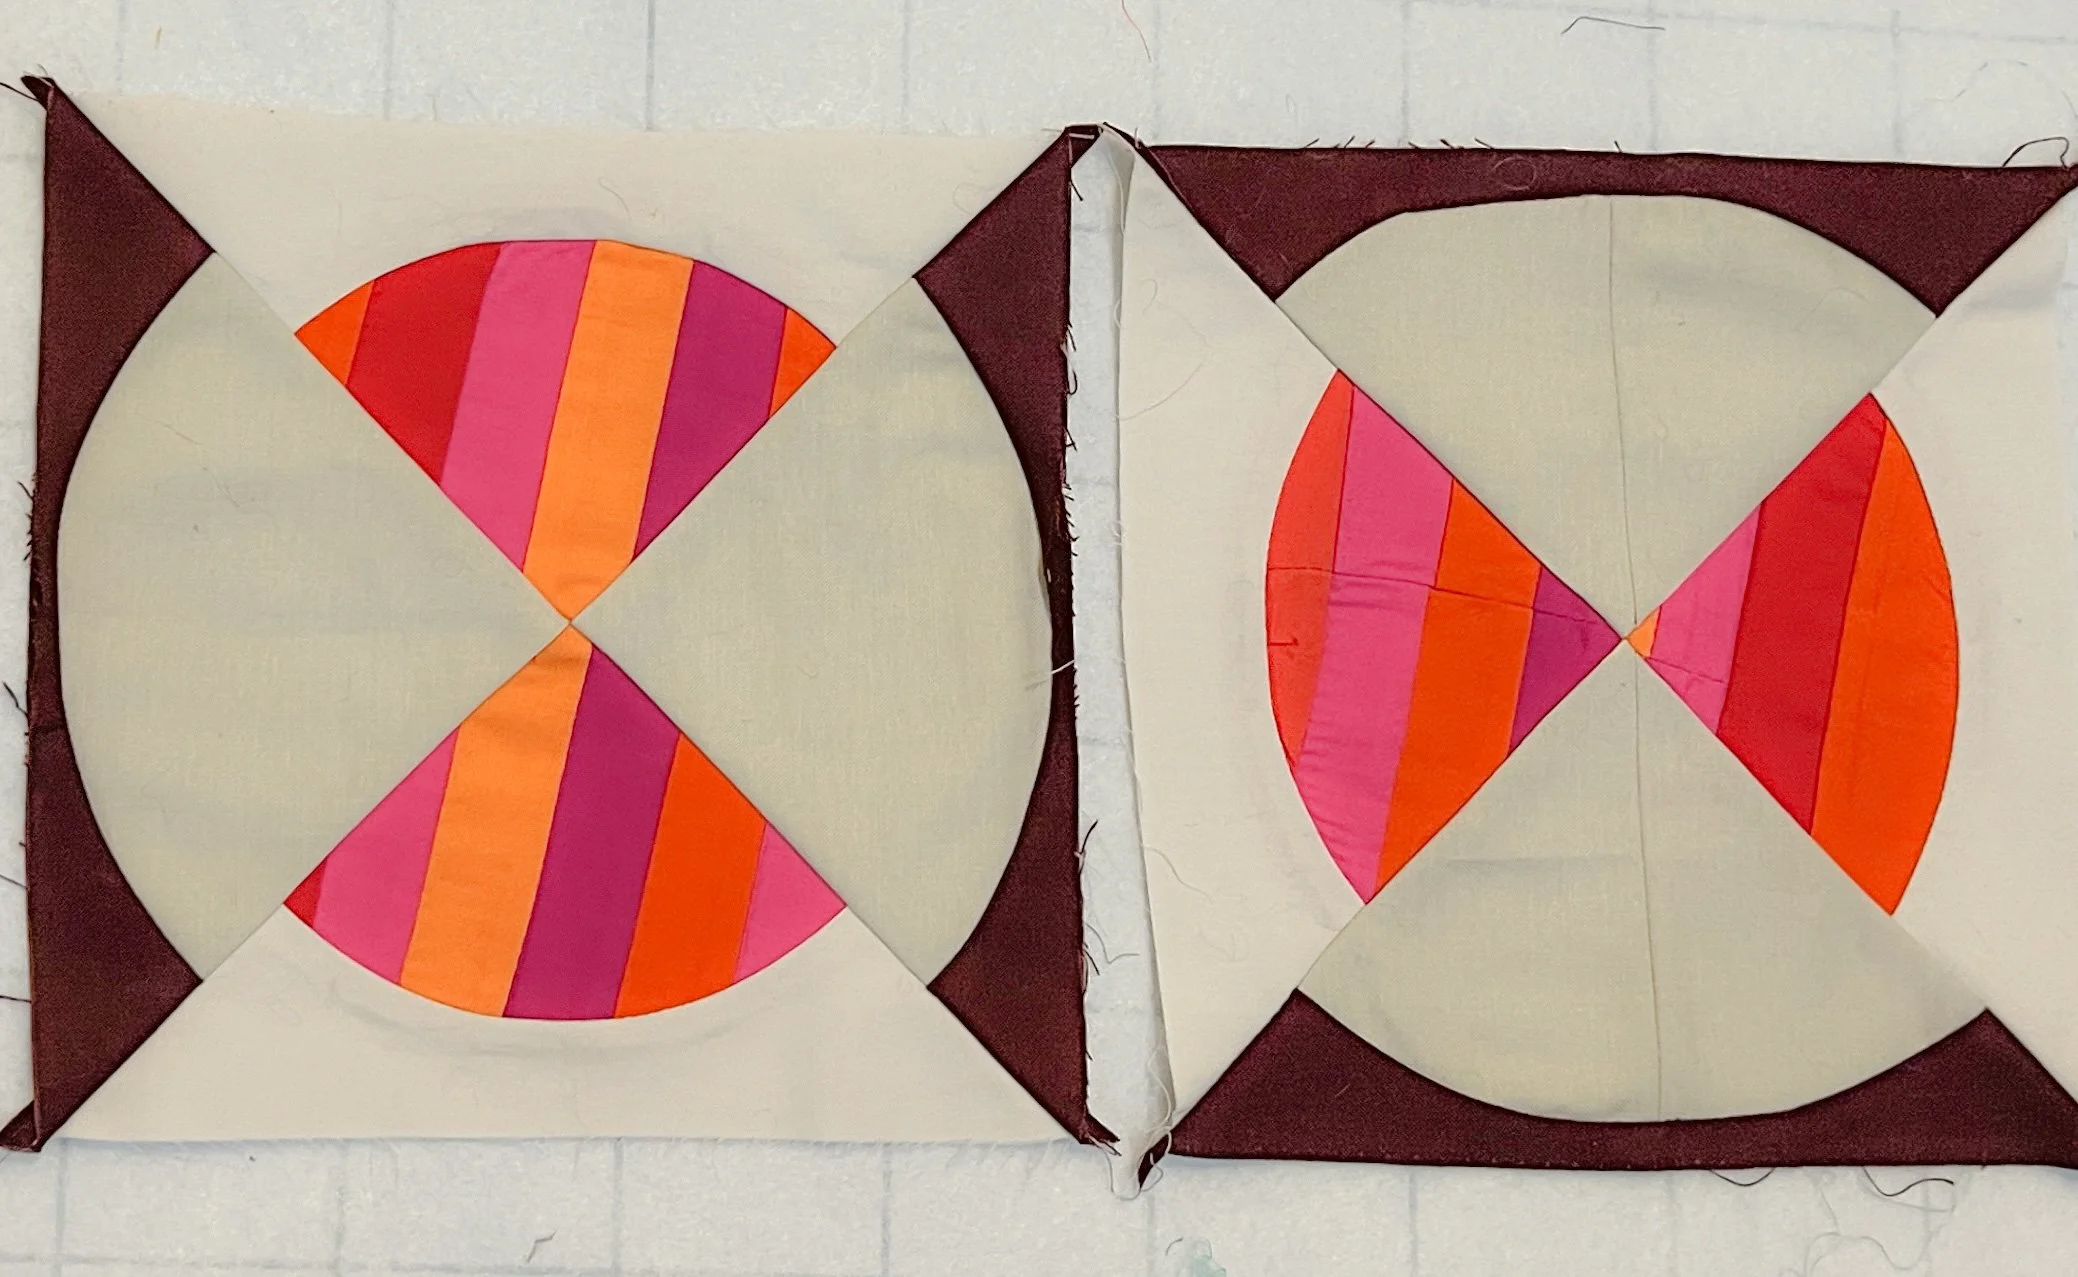
Halfway through my circle play session, I glanced at two inset circle quilt blocks that I had sewn. One was just a solid circle and the other was a striped circle I had created using foundation paper piecing.
I wondered, “What if I use those two inset circles to create an hourglass block?” I tried it out and something magical happened. Because of the differing values in the blocks, an interesting effect happened.
Figure-Ground (a.k.a. Use of Negative Space)
As I examined these blocks, I was reminded of something Nancy Crow mentioned in a lecture I had just watched.
“Over these last 20 years, I’ve been able to develop what I would call an indepth course work in figure-ground, classical figure-ground composition. Because what I saw in quilt making is that so many quilters did not understand [figure-ground composition].”
-Nancy Crow
There are a variety of figure-ground relationships that I won’t go into here. But, I do what to talk about what happened in the block above. It’s an example of figure-ground ambiguity, which is defined as a composition where elements appear to be both figure and ground (a.k.a. negative space) simultaneously. You’ve probably seen examples of this type of art before, but the artist Noma Bar does it expertly.
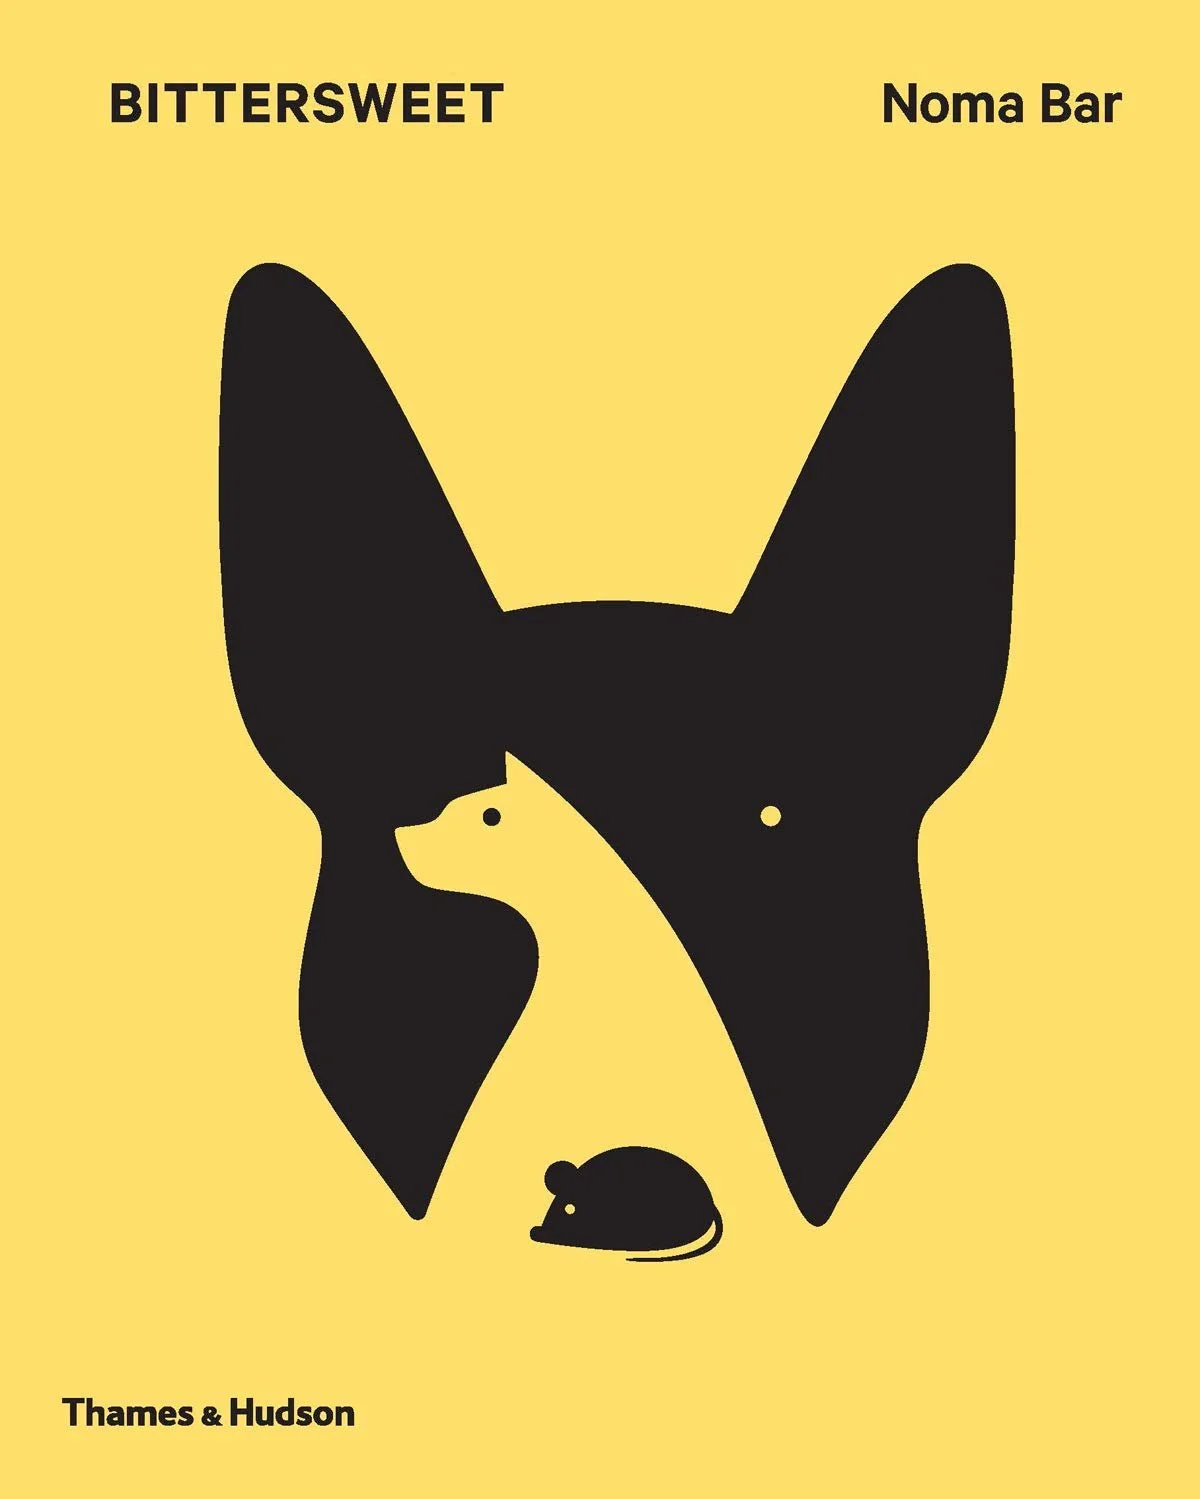
Artwork from artist Noma Bar is a great example of figure-ground ambiguity.
You see a dog. But, then, you see a cat. Then, a mouse. But, it’s still just a dog…kinda.
Needless to say, I was transfixed with this effect and wanted to explore more.
That’s when I headed to the computer.
Playing with fabric was a great way to get inspired and stumble upon a treasure. But, I headed to the computer to refine and develop a final design. I work in Adobe Illustrator. It allows me to make my own shapes. I can even pull in digital fabric swatches from the major fabric manufacturers thanks to resources like Play-Crafts. Plus, some manufacturers, like Paintbrush Studio, provide digital swatches on their websites.
I started by recreating the block above in Illustrator. Then, I just played around with changing elements of the block, etc. Until I finally landed on this design.

Mock up of the Obscure quilt design in Adobe Illustrator.
Refining my color palette
I played around with lots of different color options in Illustrator but I just kept coming back to a color palette similar to the quilt blocks I made. Once I knew I wanted to use these colors, it was a matter of hunting down the right fabrics. I knew I didn’t need a lot of fabric in order to create those stripes, so I wondered if I could find a fat quarter bundle. After lots of googling and Etsy-ing (doesn’t work as well as a verb), I happened upon a Kona Solids Fat Quarter Bundle called “Birds of Paradise” that had all the colors, tints and shades I wanted.
The real challenge was the grey. I had a particular tint in mind. I wanted it to be really close to white and on the cool side (i.e. bluish). It was much harder to find this color than I had expected. No one seemed to have anything close. All the greys, even the light ones, were too dark. I visited Alison Glass’ website because her fabrics always come in unique colors, and sure enough, there it was: Cloud. 😍
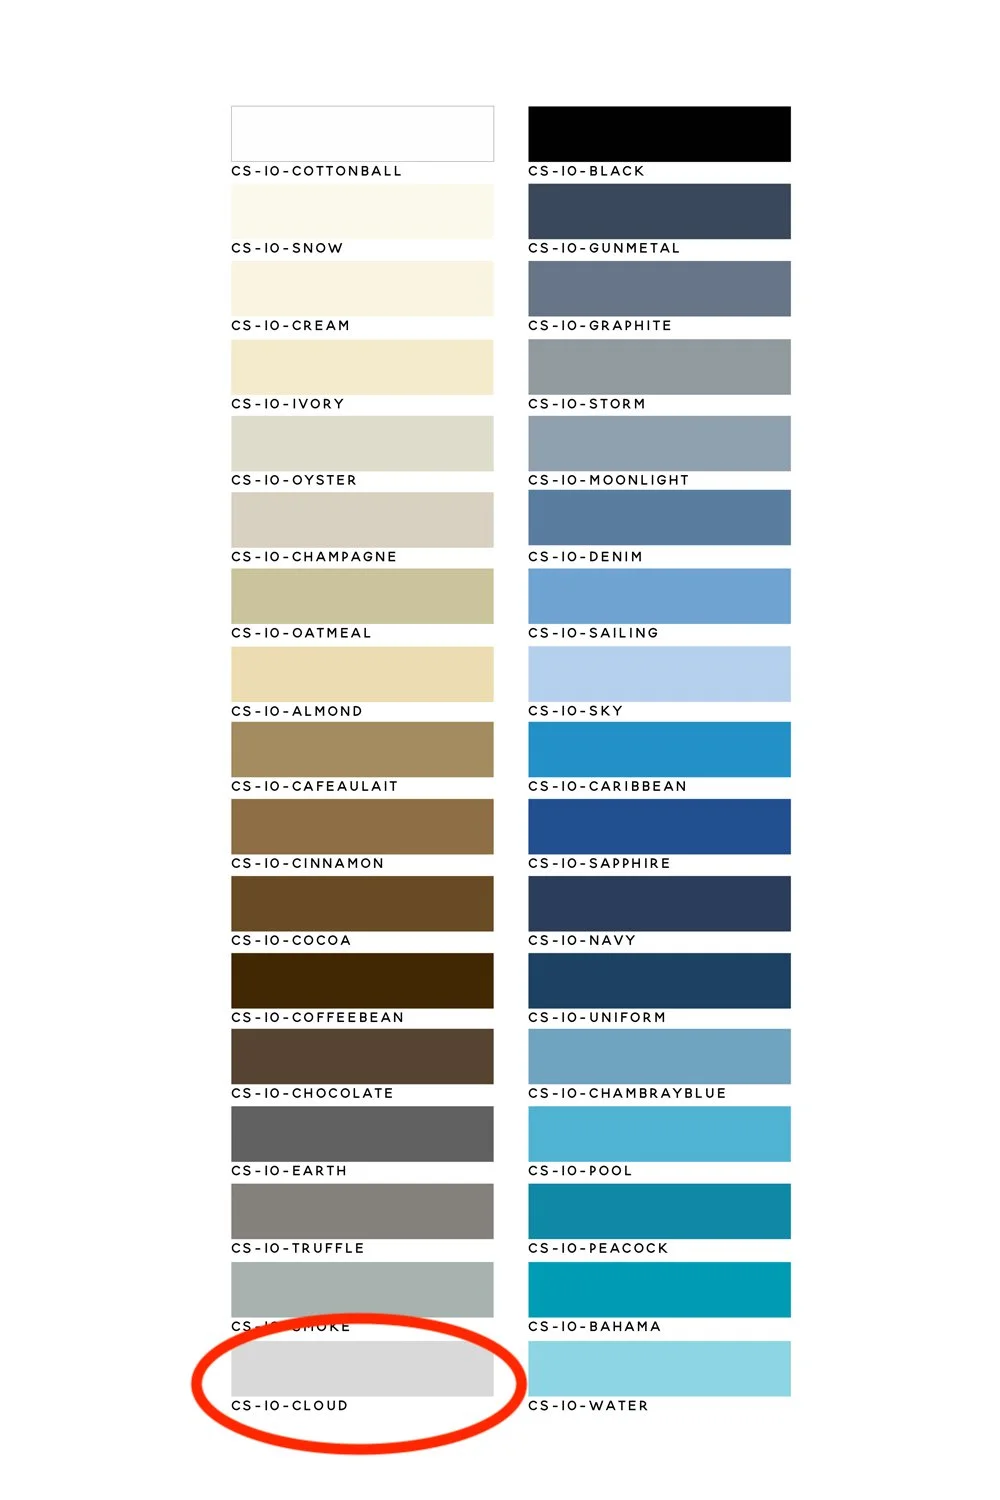
A selection of Andover Century Solids fabric colors
The color of this fabric is so subtle and soft in real life. I’m in love with it. I want to include it in all my quilts from now until forever. Who knew a grey fabric could be so beautiful.
Once all my fabrics were set and I calculated my fabric requirements, I ordered fabric and started to write notes about what I would need to cut and how I would go about constructing my quilt blocks.
What have I gotten myself into?
You can pretty much assume I will ask myself this at some point in the making process. I tend to be drawn to designs that are just outside of my abilities to create. 😅
I knew precision would be key, so I decided early on to use freezer paper templates. I decided to take the approach of constructing the blocks from easiest to hardest— to almost trick myself into sticking with this. By the time I got to the hard stuff, I’d be so invested that there was no way I’d give up at that point.
The two blocks that are versions of an hourglass quilt block were pretty straightforward. No problem. Next up, was the inset circle with an inset triangle (I think that’s the best way to describe it). This block could have been achieved via quarter circle blocks (a.k.a. Dunkard’s Path block). That’s what a sane person would have done. That’s not what I did (see note above about taking on projects outside of my abilities).
I wanted to avoid all the seams that would come with a quarter circle construction. So, I created freezer paper templates and went for it. The Y-seam wasn’t that much fun, but I managed to finish the blocks and didn’t lose the point of my triangles! Yay!
So, with a bunch of renewed confidence, I took on the last block. The intersecting curves here made this really difficult (for me). I decided to create my striped piece using foundation paper piecing. I used freezer paper templates for the other pieces. I had to redraw those templates because my first try didn’t leave enough extra fabric around the edges. It’s always better to make the quilt block bigger than you need and trim it down, right?
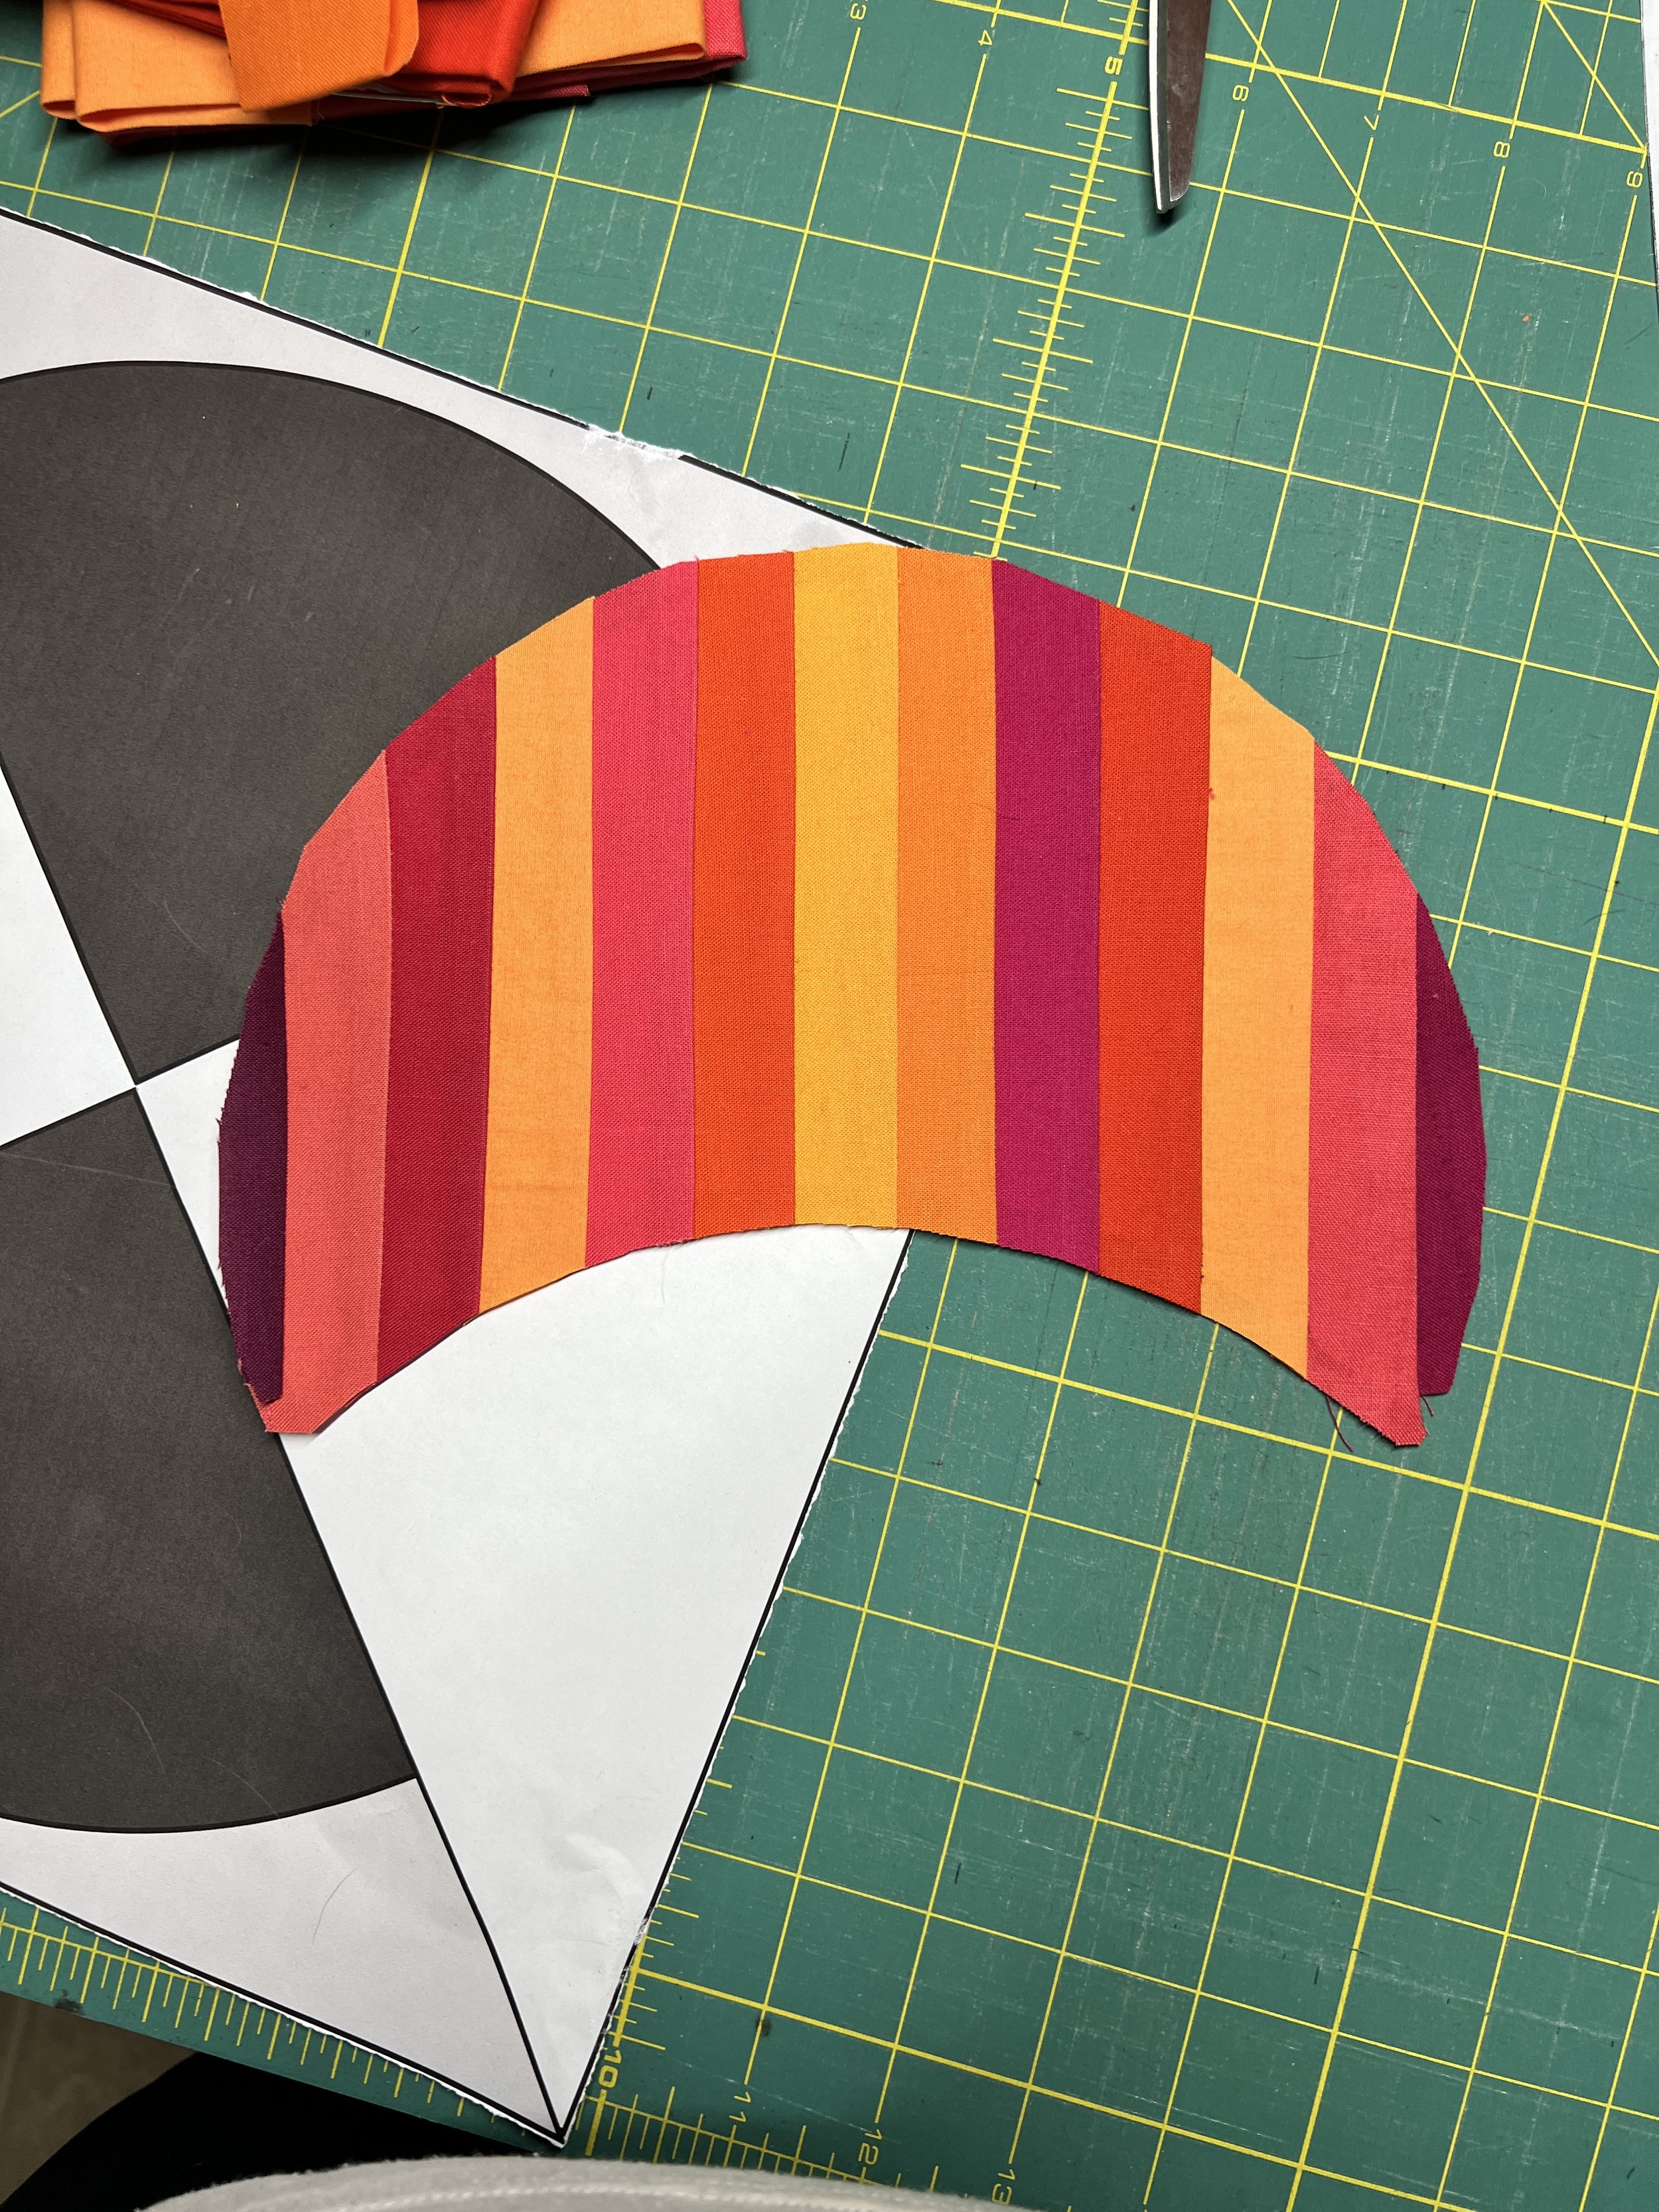
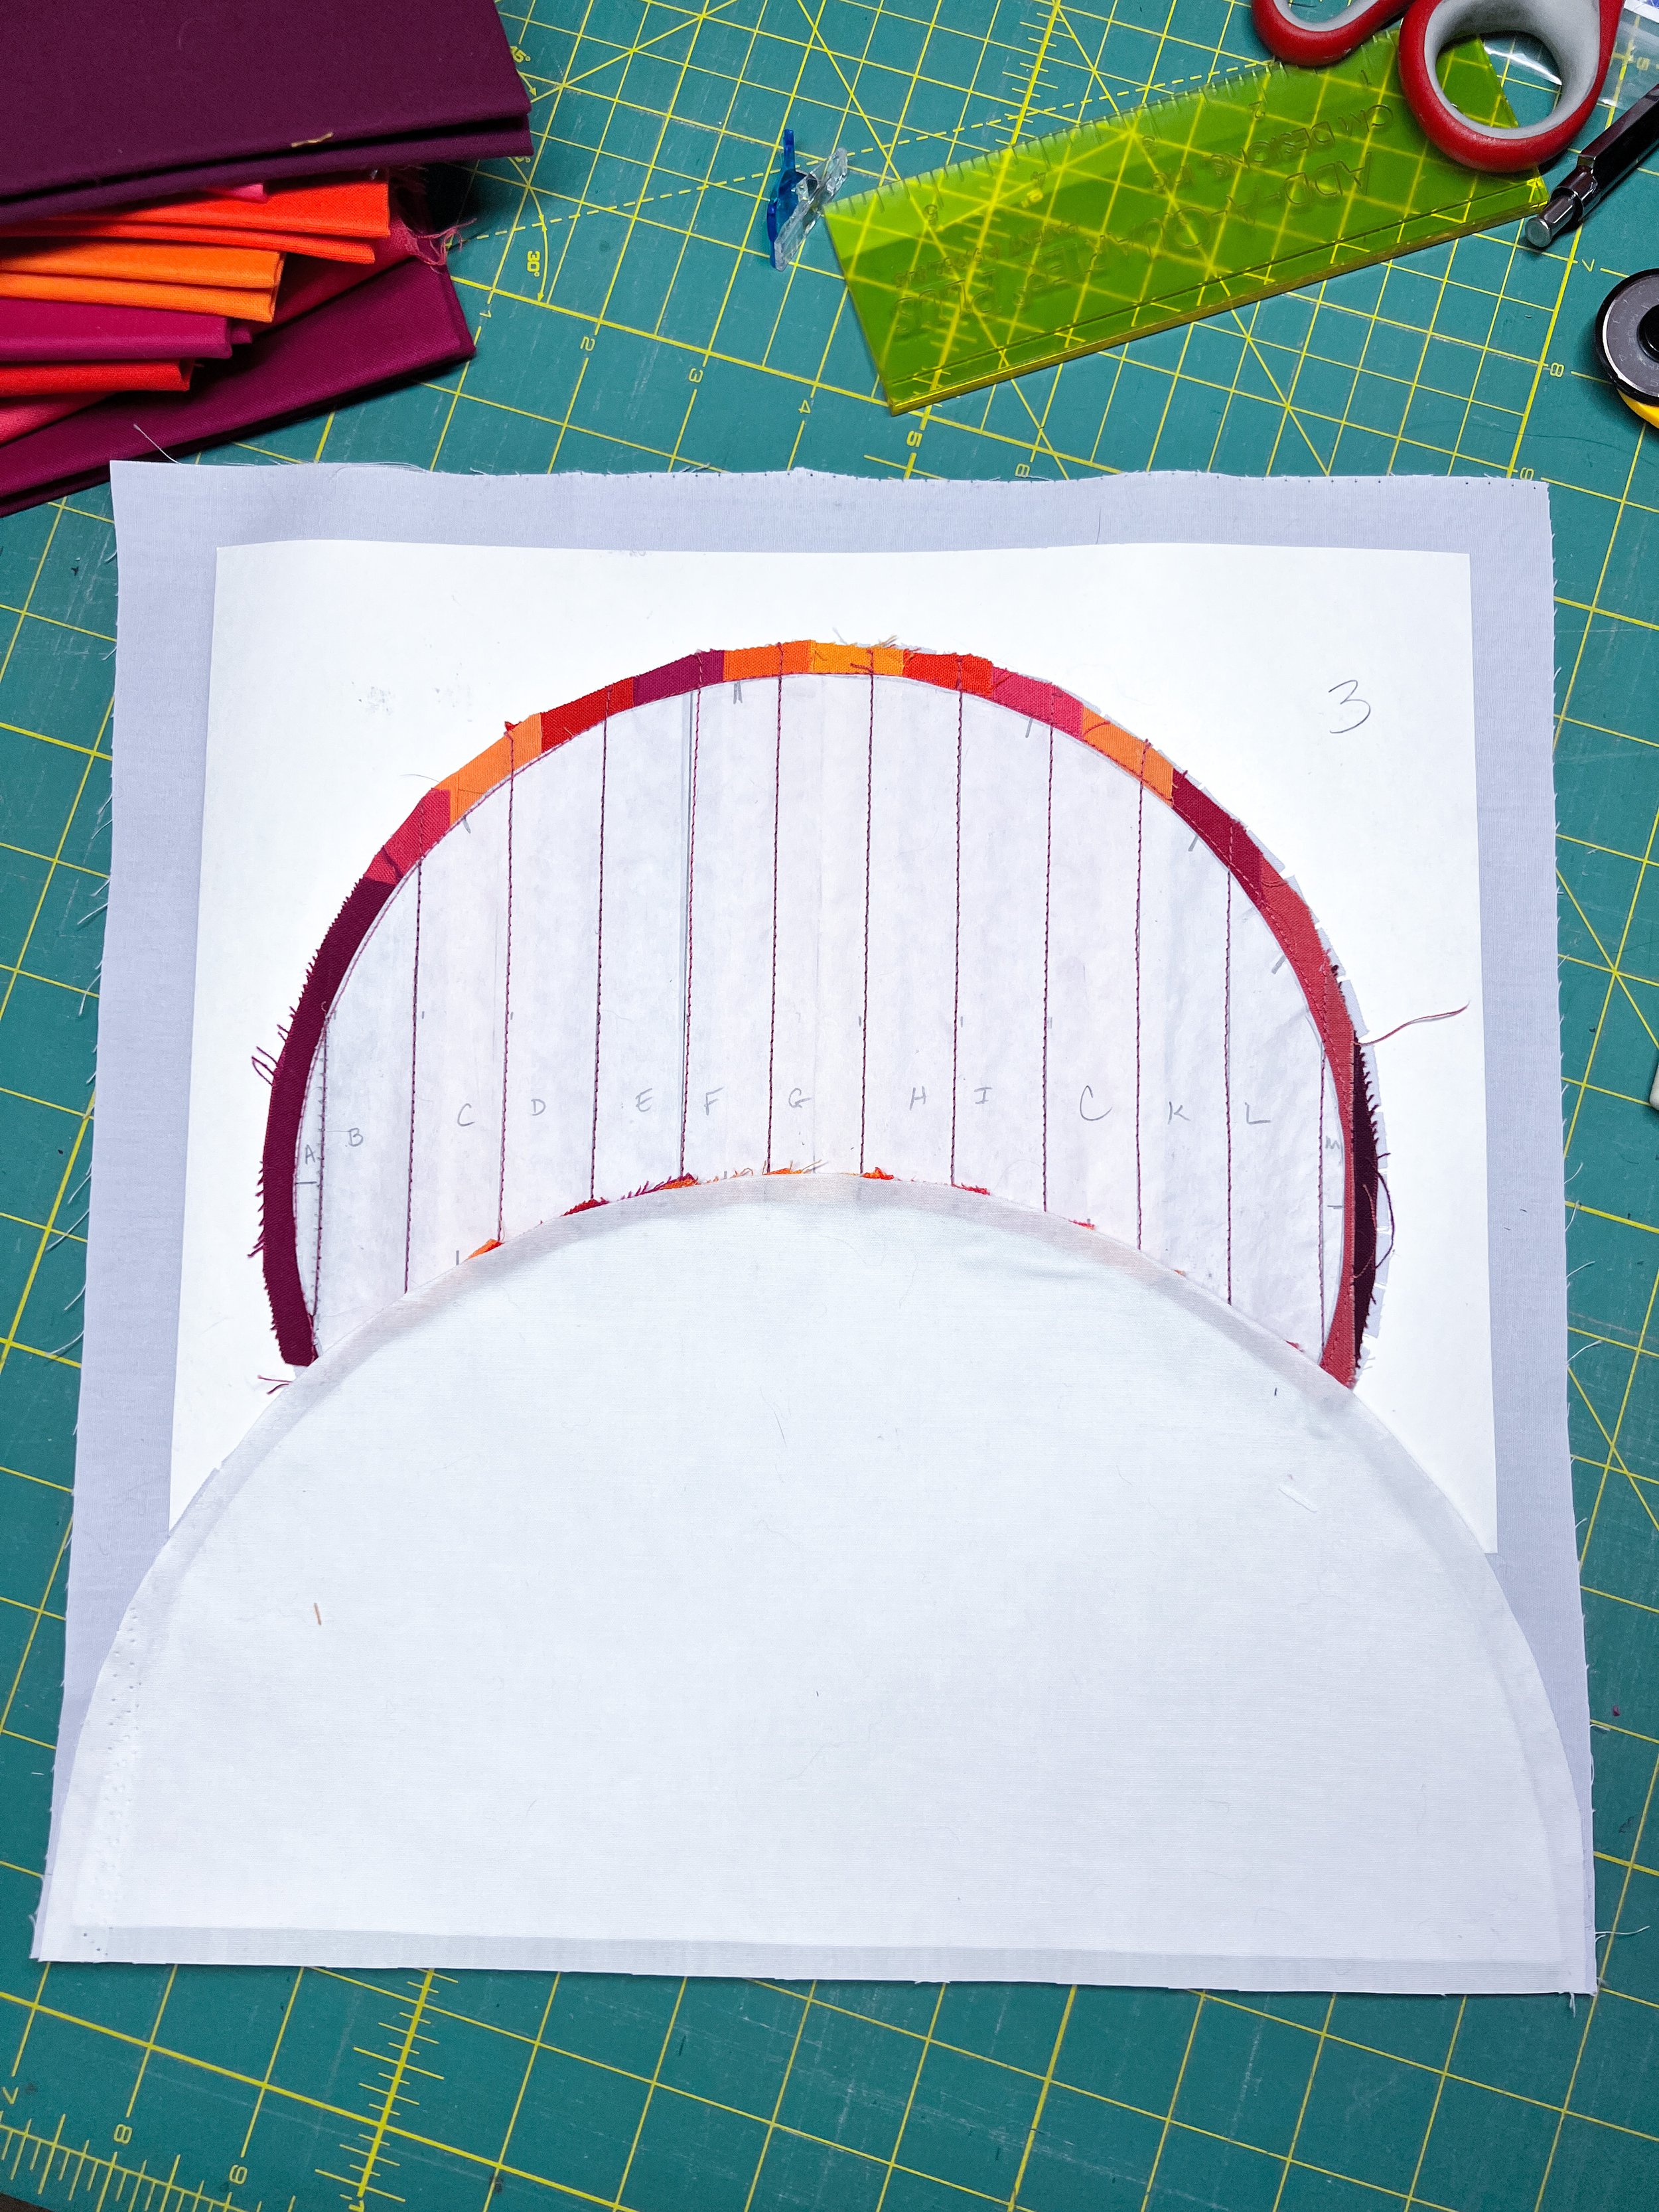
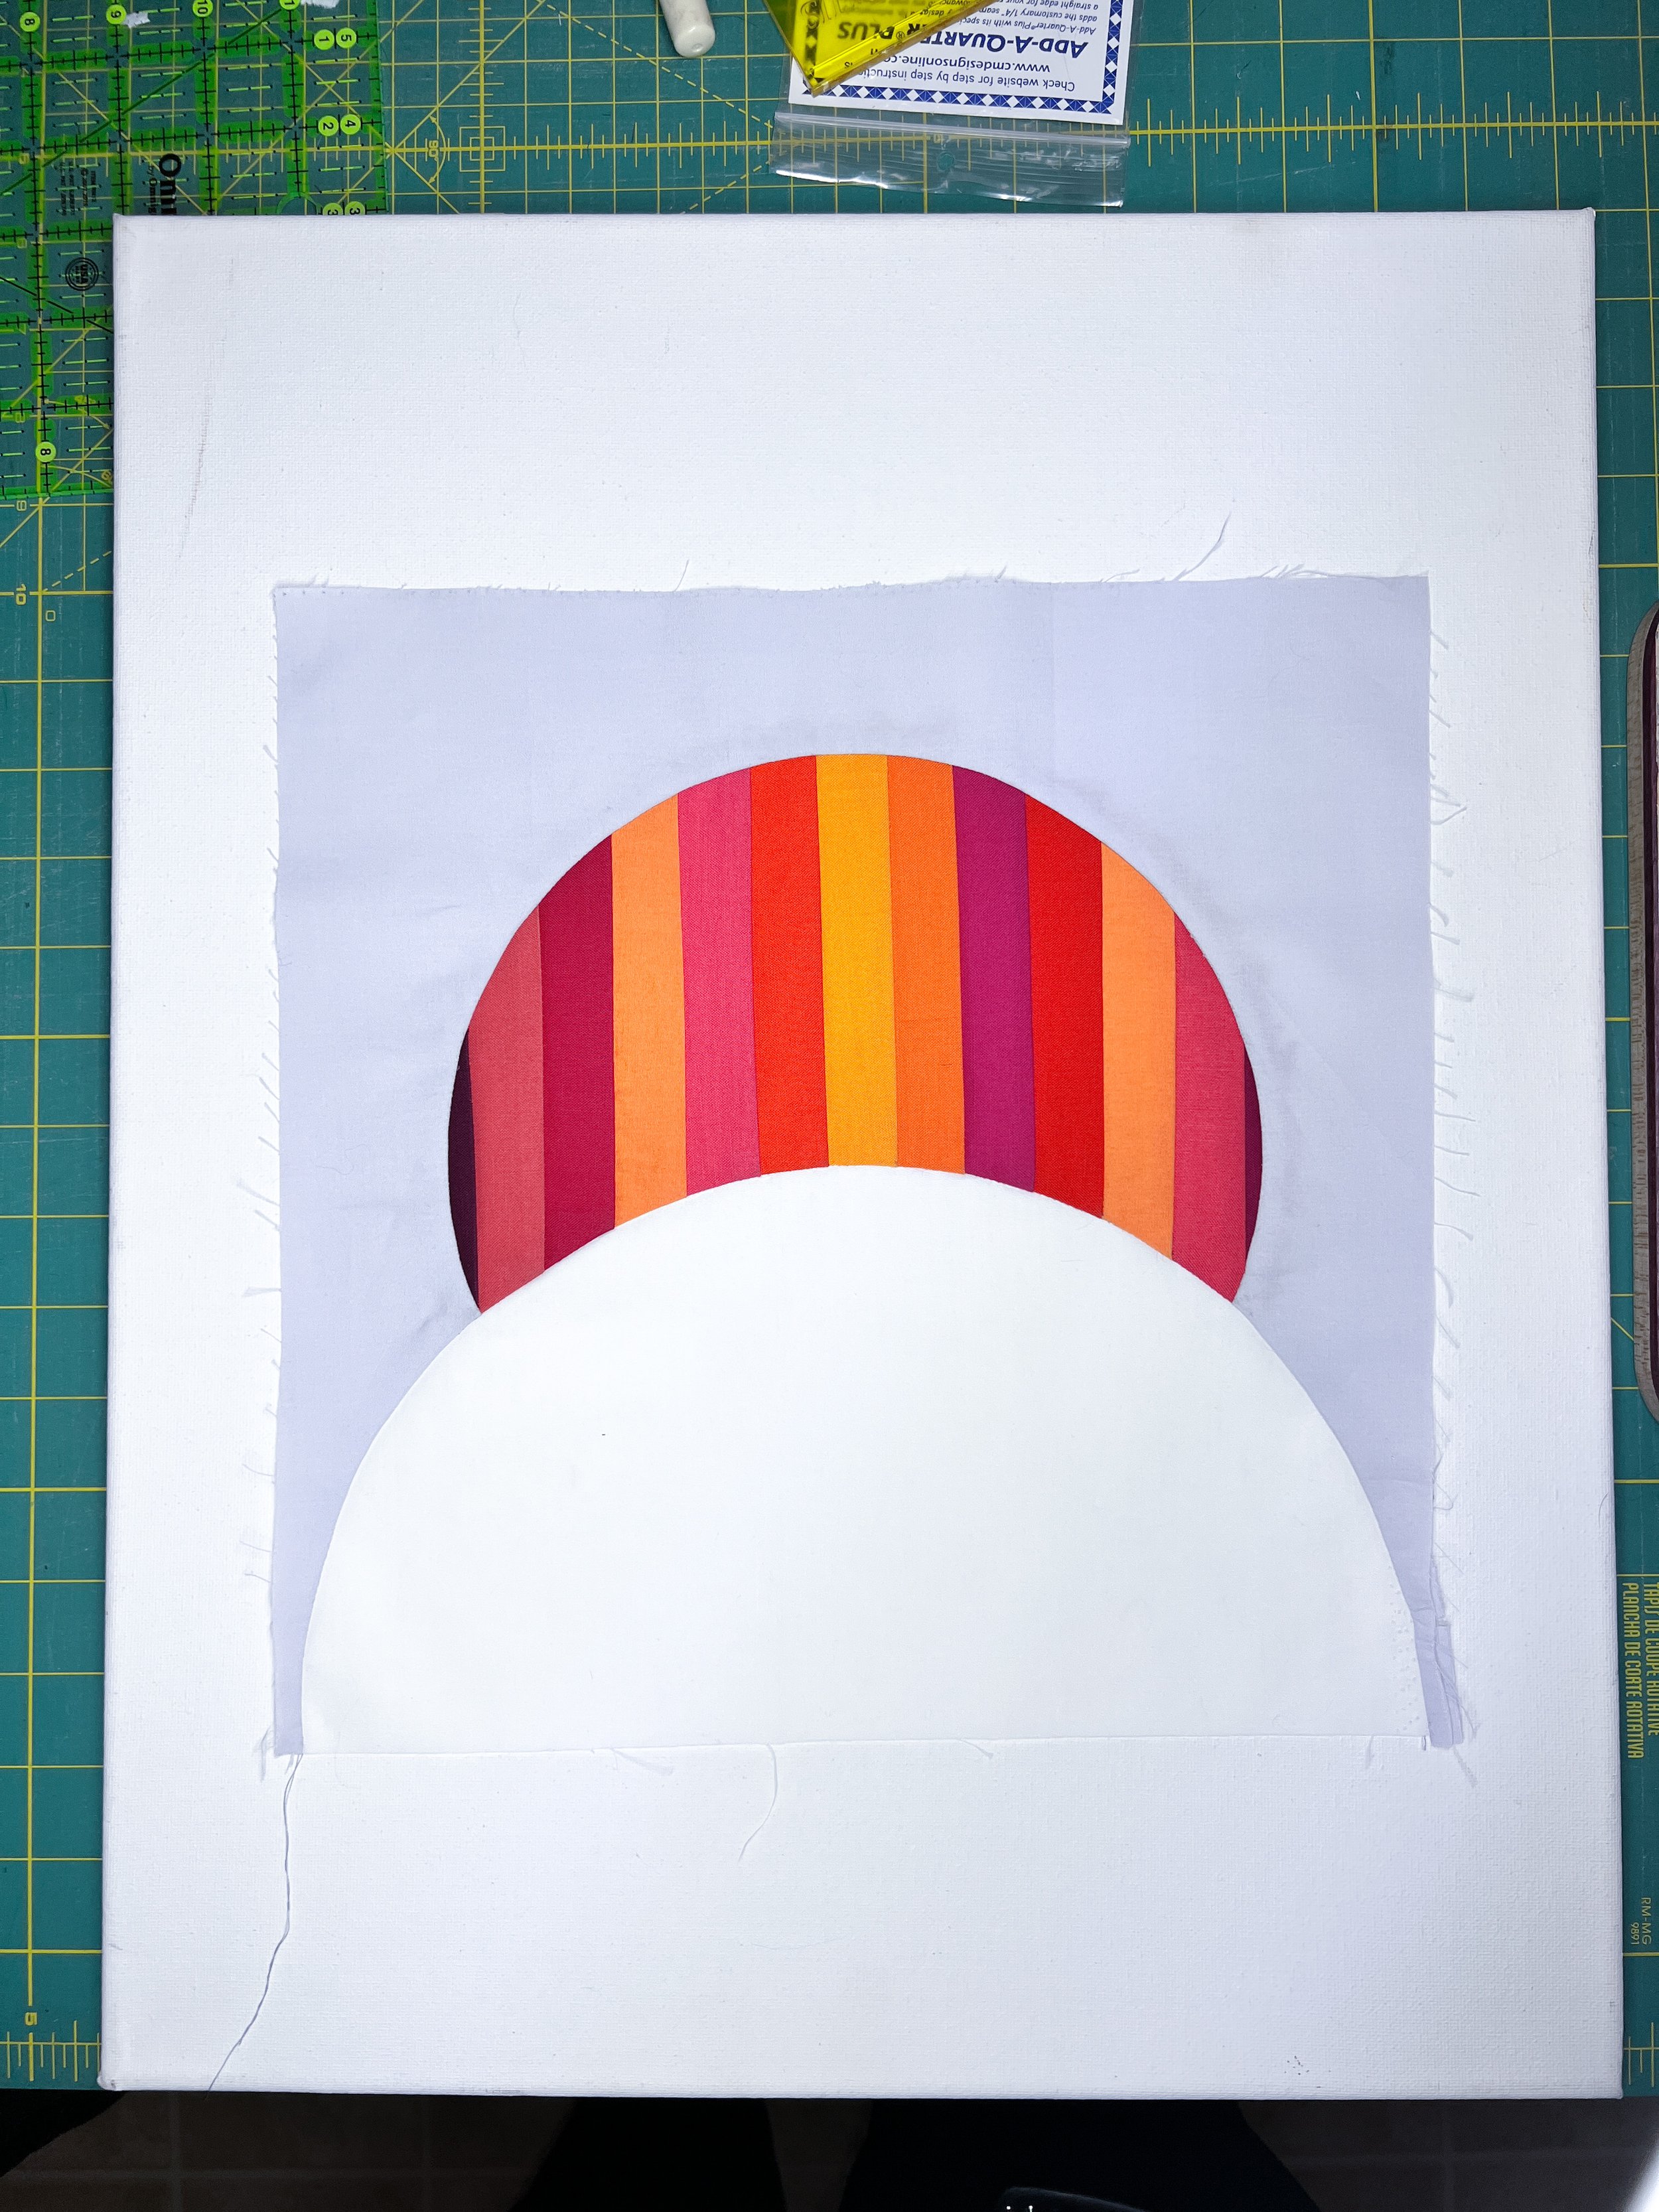
I managed to get all my quilt blocks sewn and was pretty happy with the results (we can always find something we don’t like—be quiet, Inner Critic!)

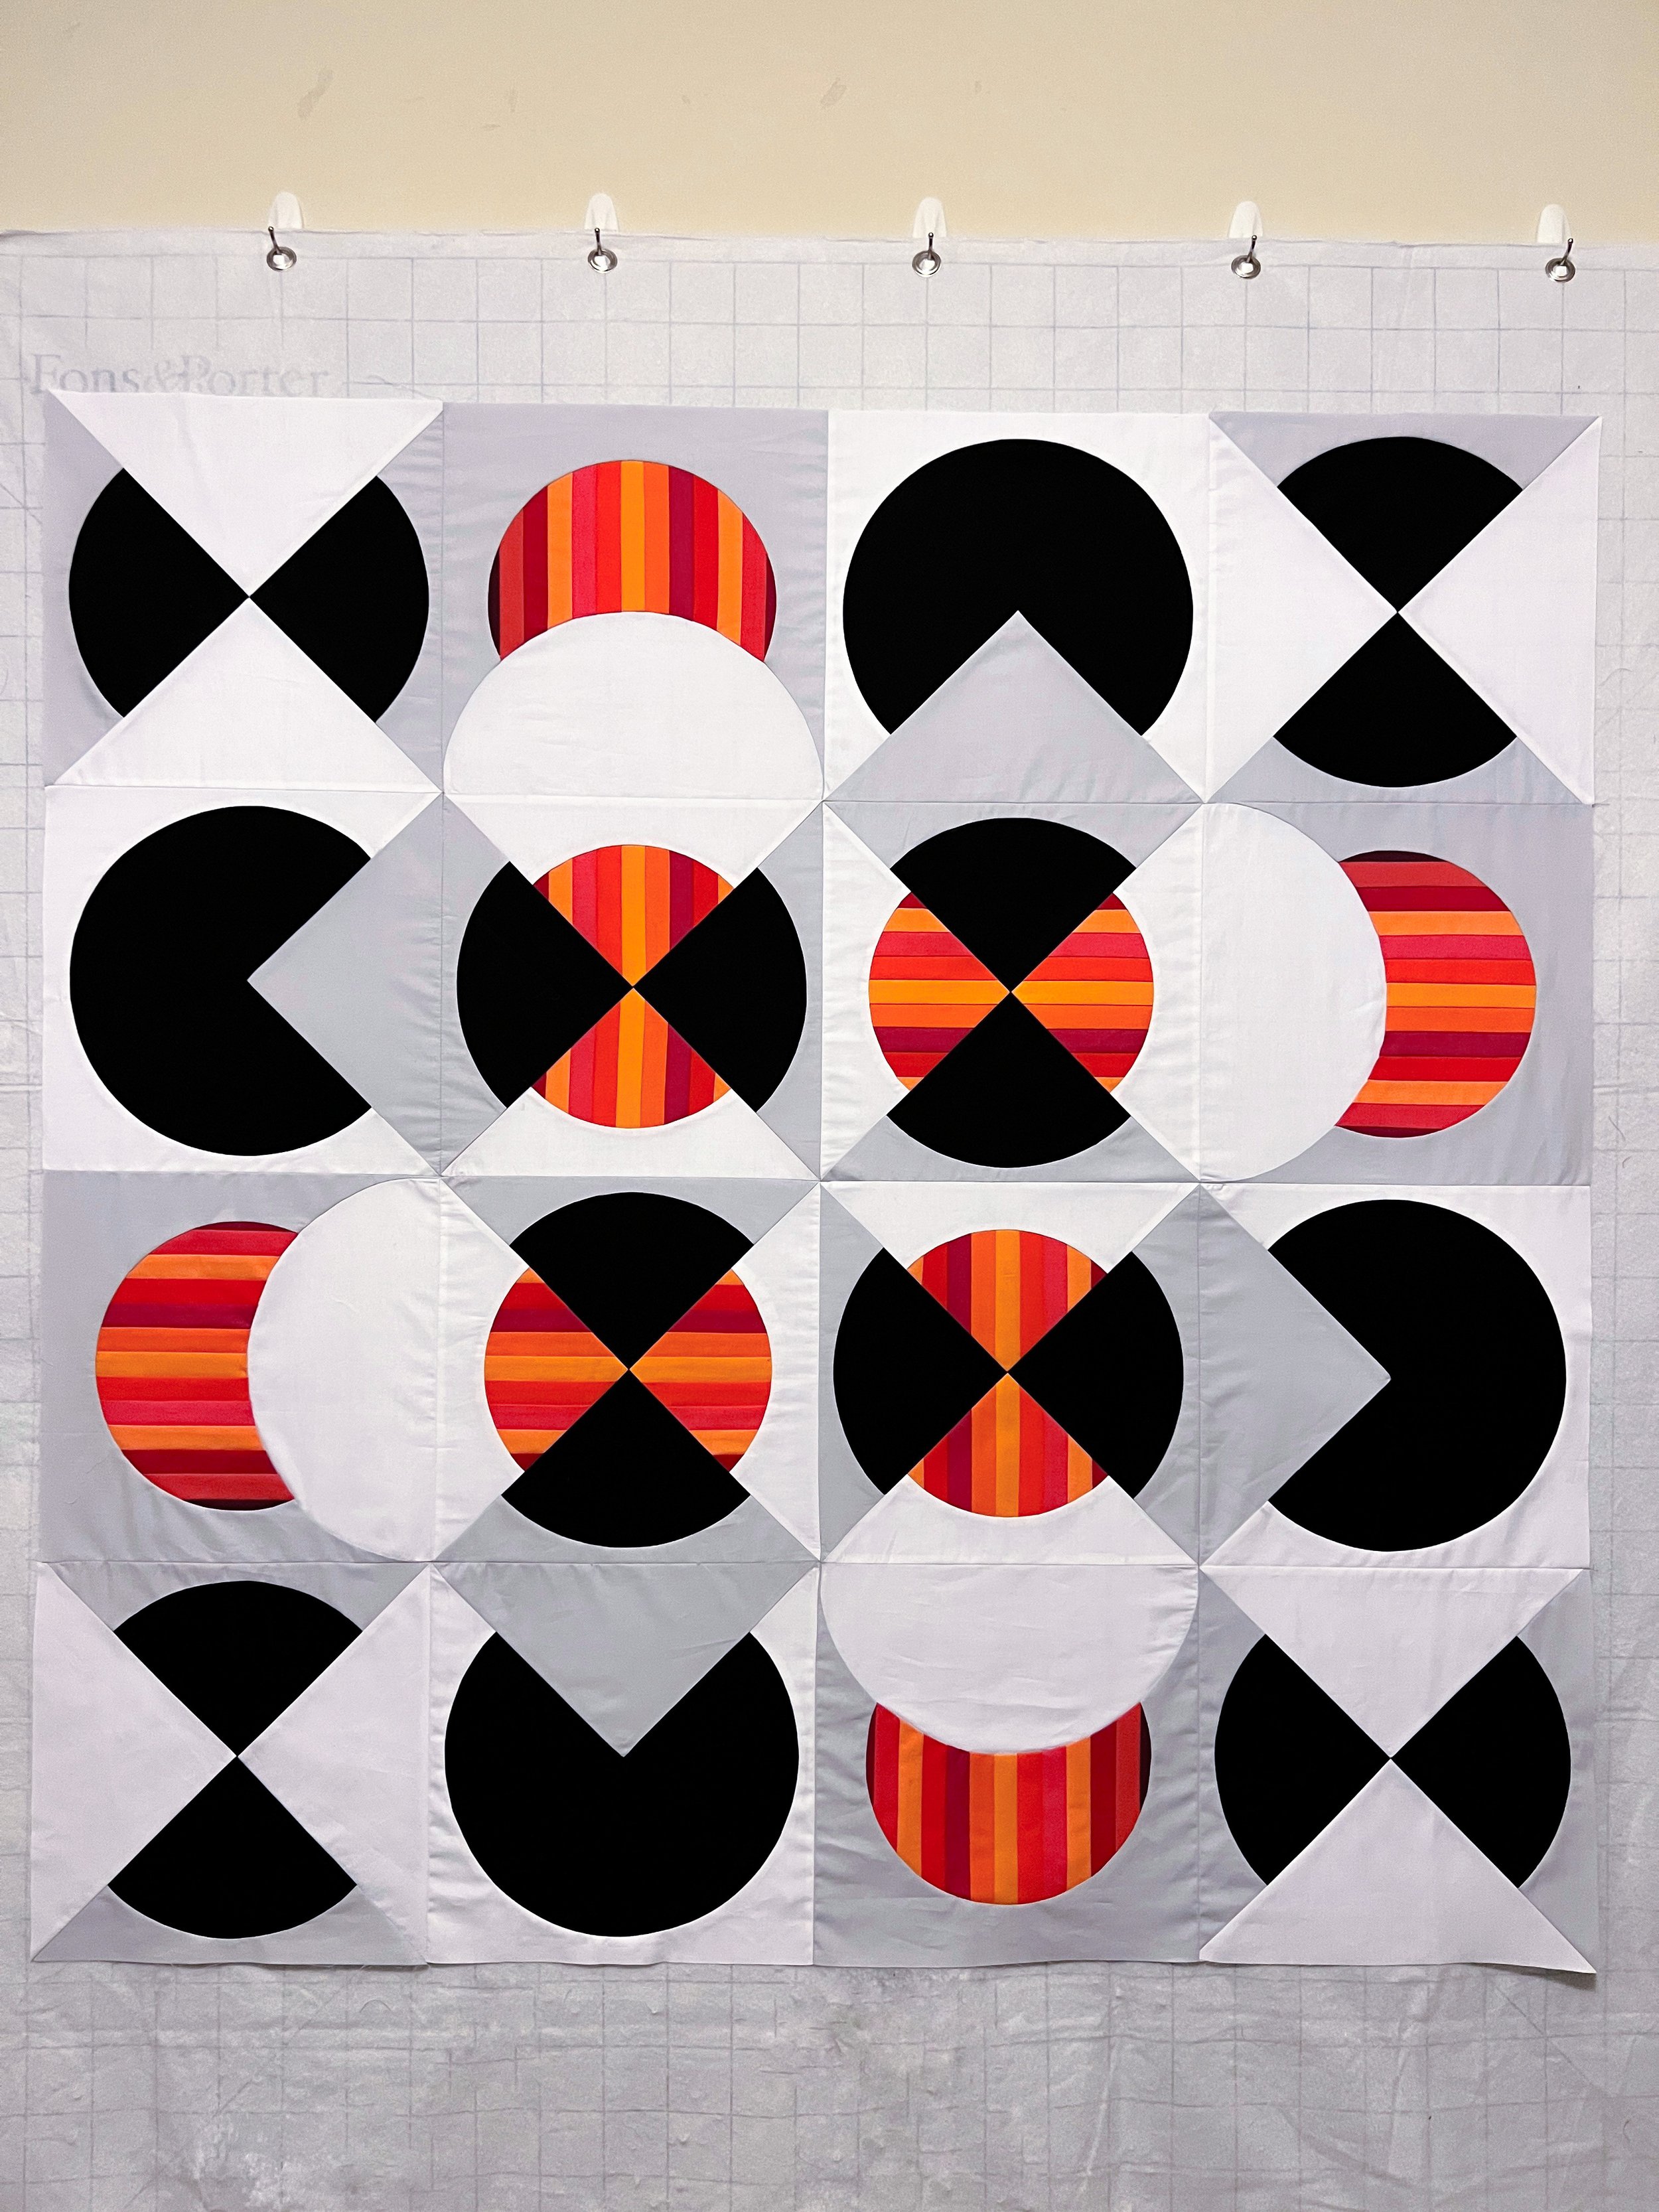
Once the quilt top was complete, I sent it off to Karen McTavish to do her magic. You can see images of the final quilt in my quilt gallery. Here’s also a quick video where I talk about my design process. Enjoy.